
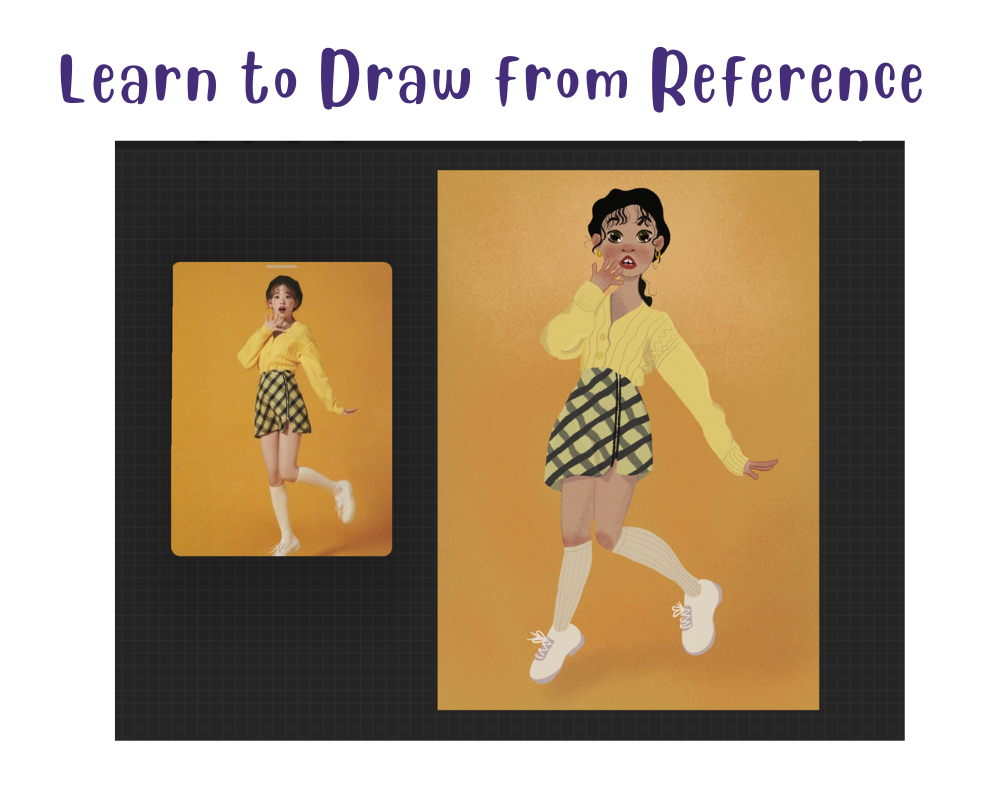
Drawing from a reference photo is a great way to improve your skills and capture realistic poses, proportions, and details. In this blog post, I will walk you through my process of using a reference image, from selecting the right one to completing a full digital illustration. If you’re looking for drawing from reference, this guide will help you refine your technique and develop your own style while using references effectively.
Step 1: Choosing the Right Reference Image

The first and most crucial step in drawing from a reference photo is selecting an image that suits your artistic goal. I usually choose Pinterest to search for a reference. That is the first thing that I do when I wake up. I browse through Pinterest and save suitable references for my warm-up sketches. When choosing a reference, keep these drawing from a reference tips in mind:
- Look for clear and high-quality images.
- Choose a pose that challenges you but is achievable.
- Select references with good lighting and shadows to help define forms.
- Use a reference that matches the style or mood you want in your drawing.
Once I find the perfect image, I save and export it to my iPad, where I will begin the sketching process.
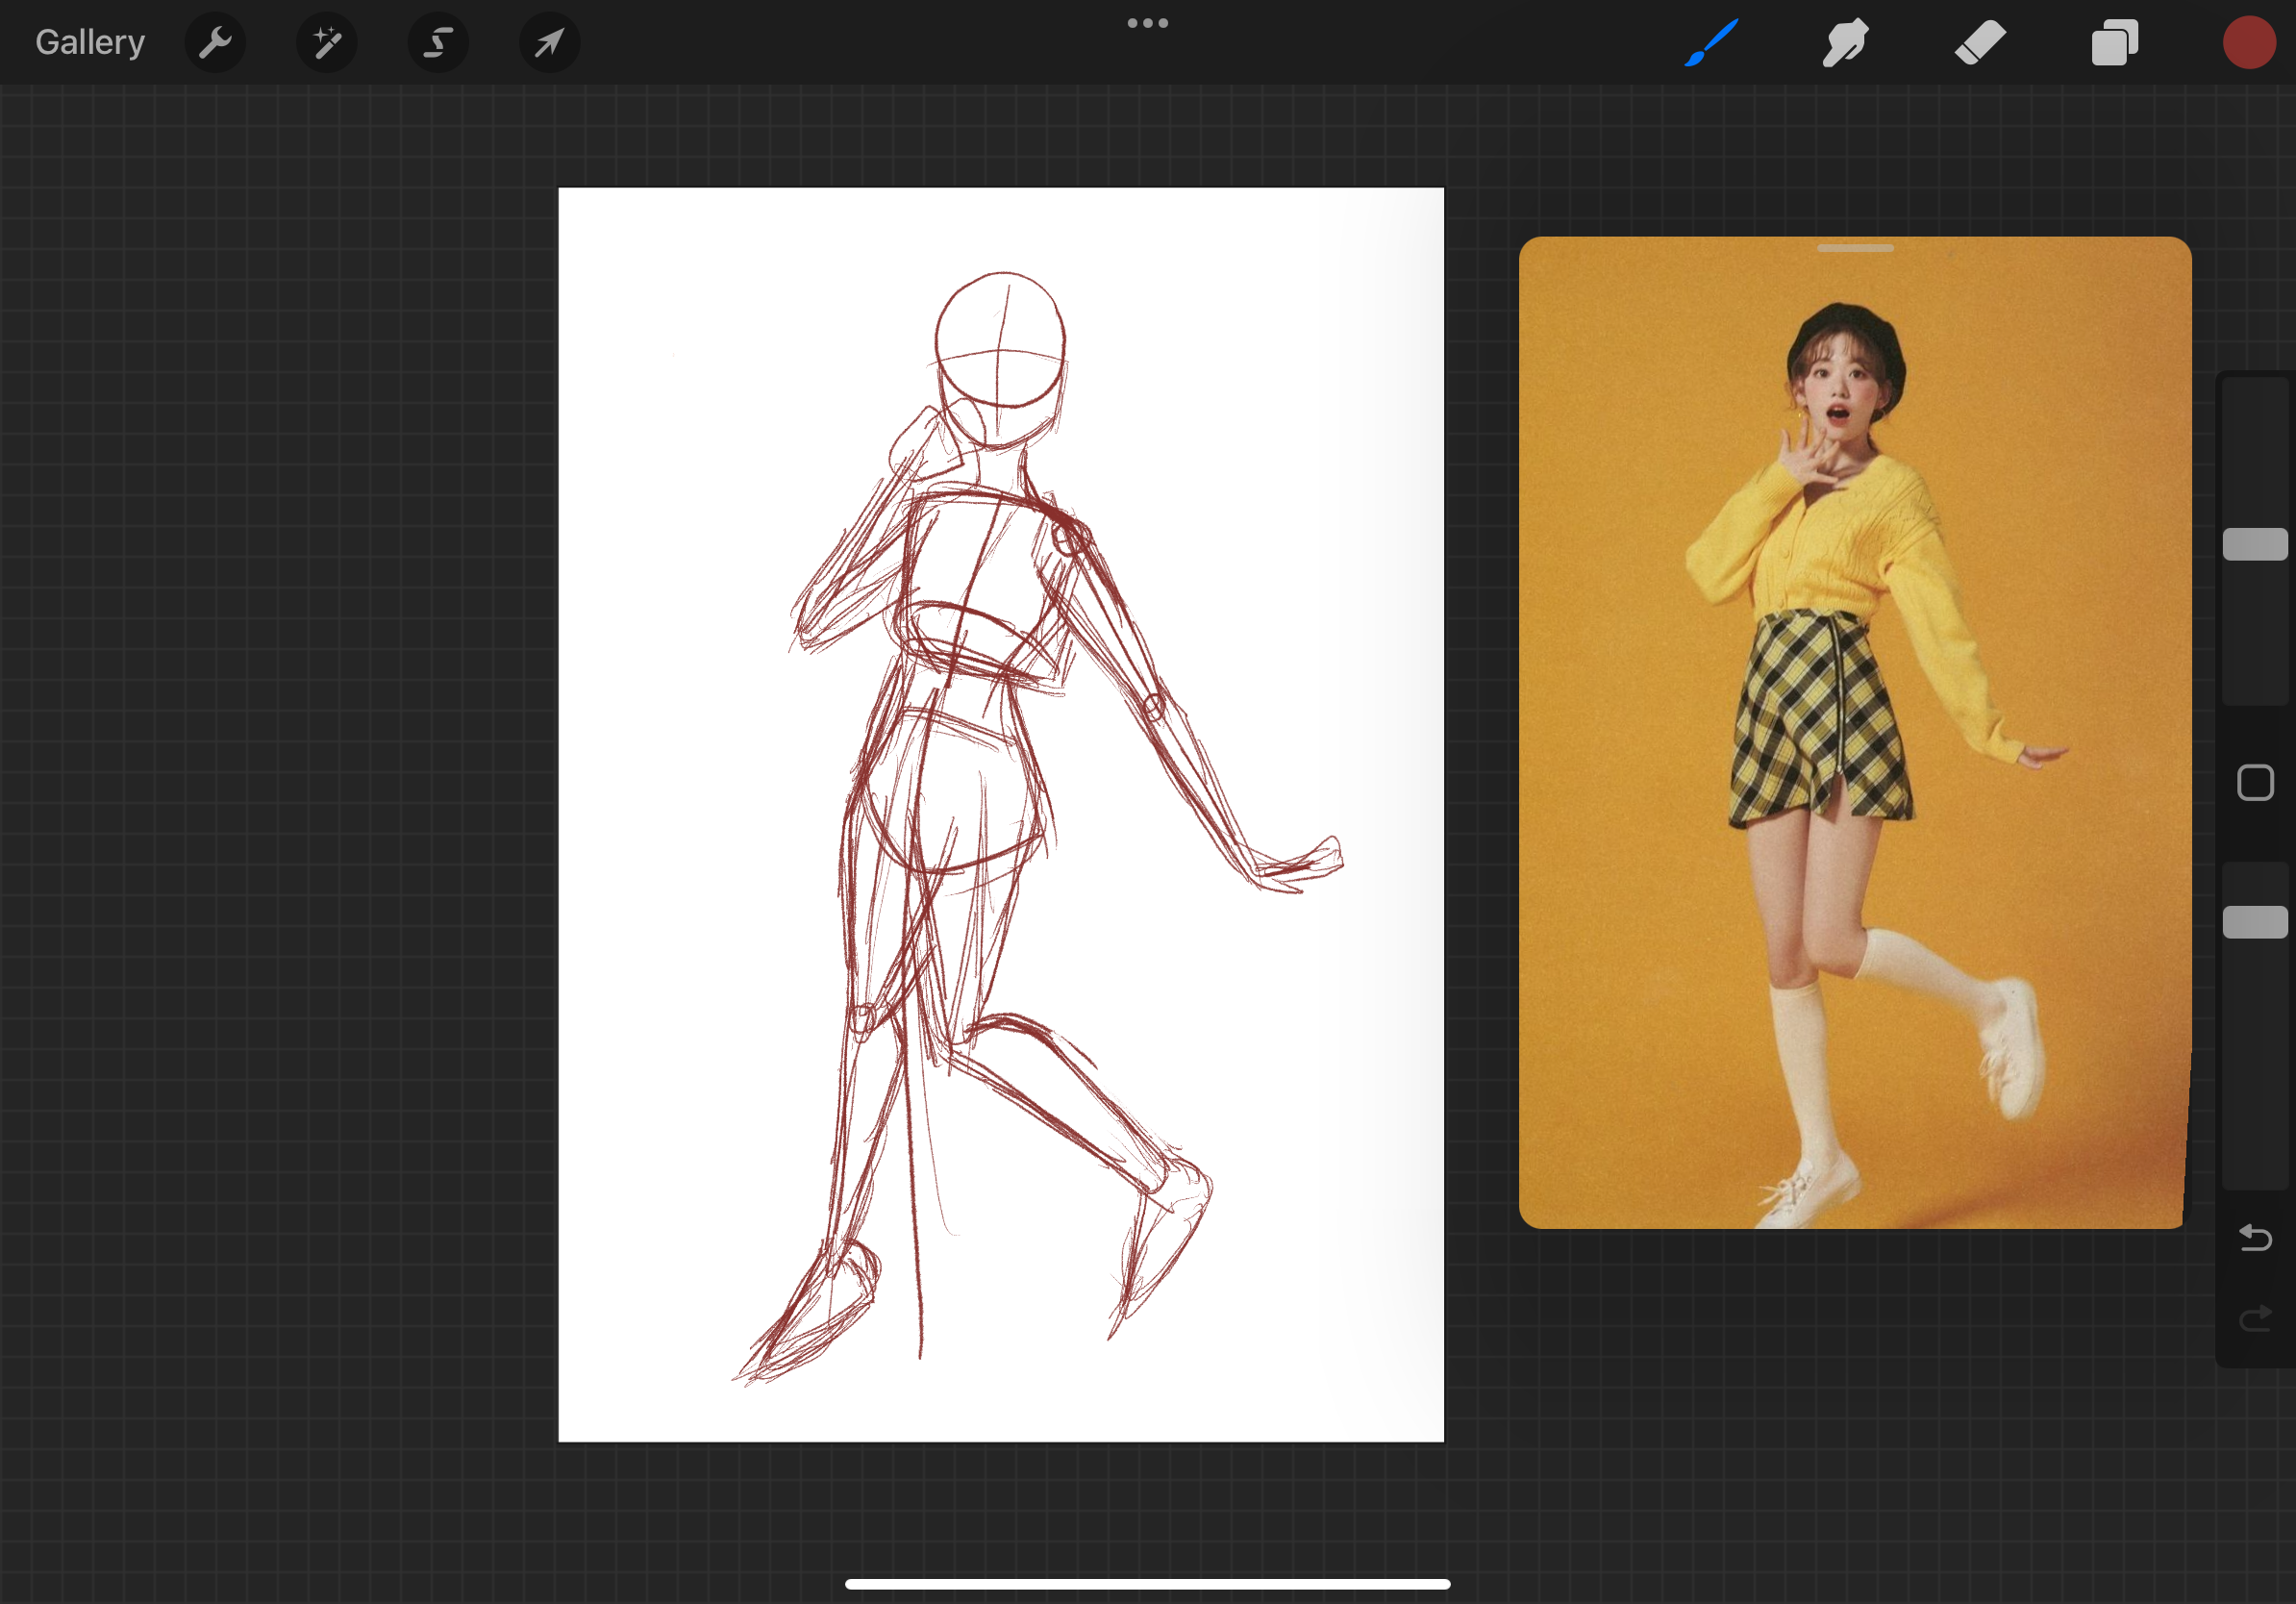
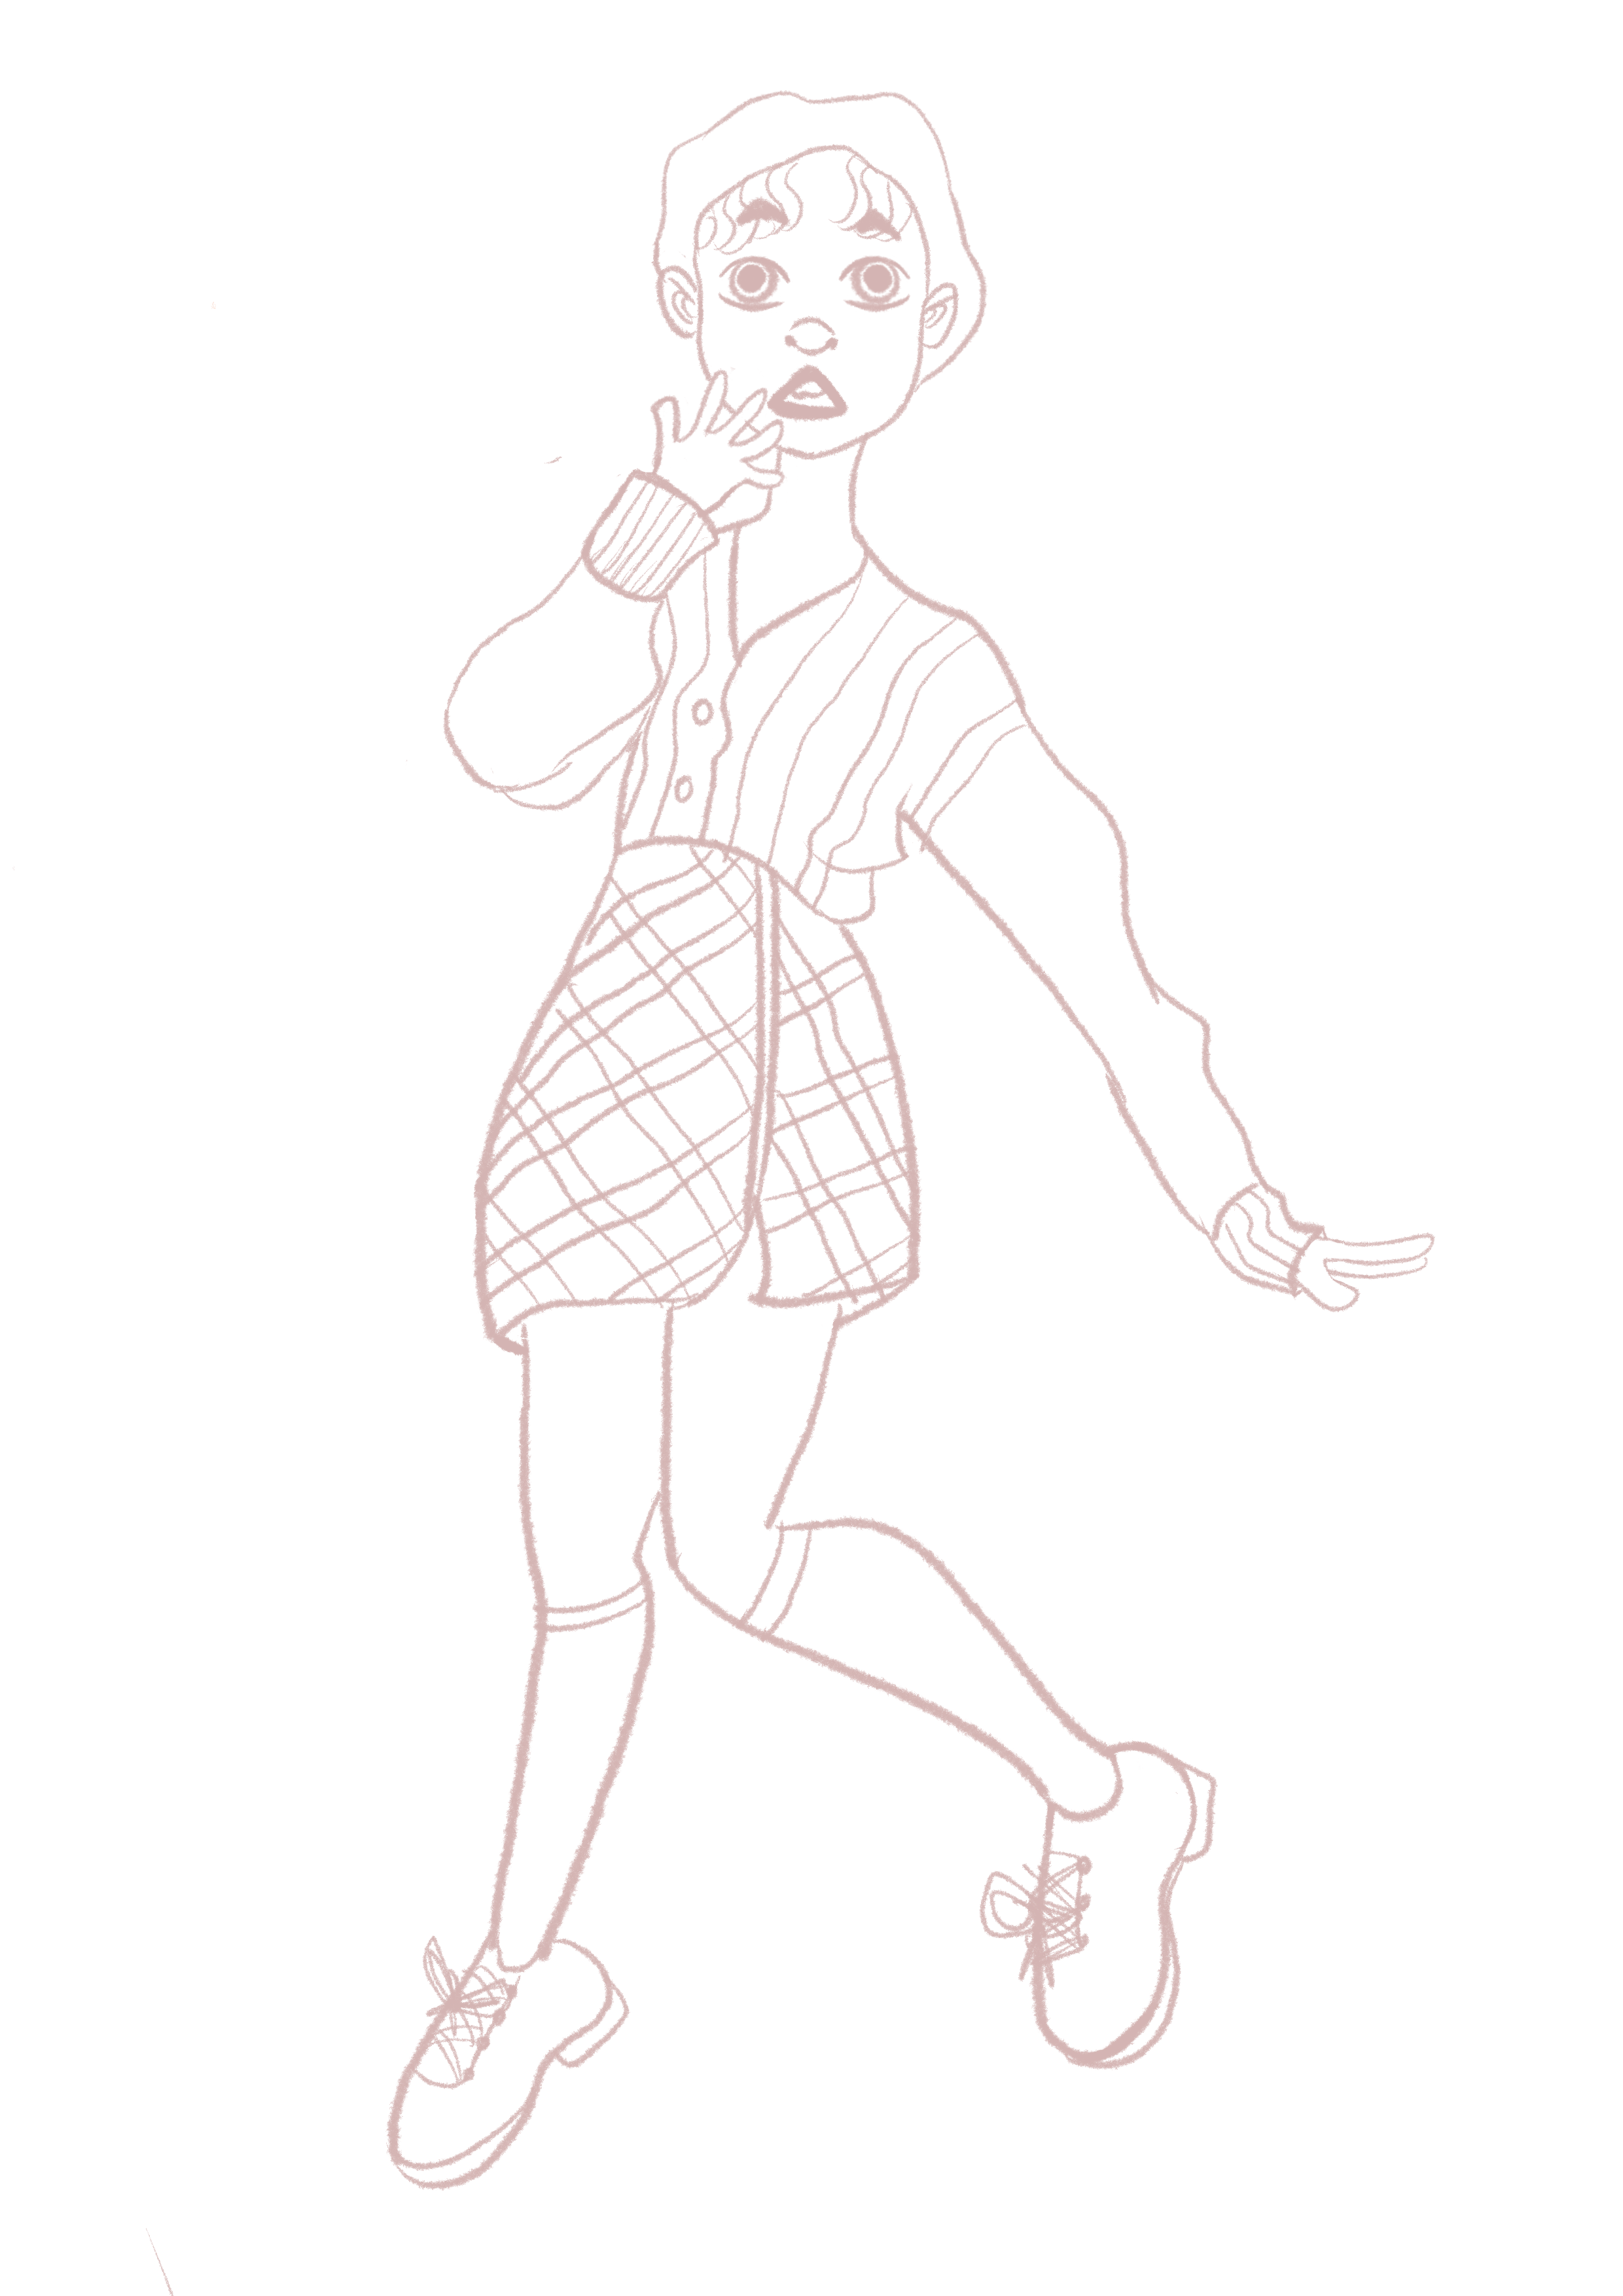
Step 2: Building the Skeleton Structure
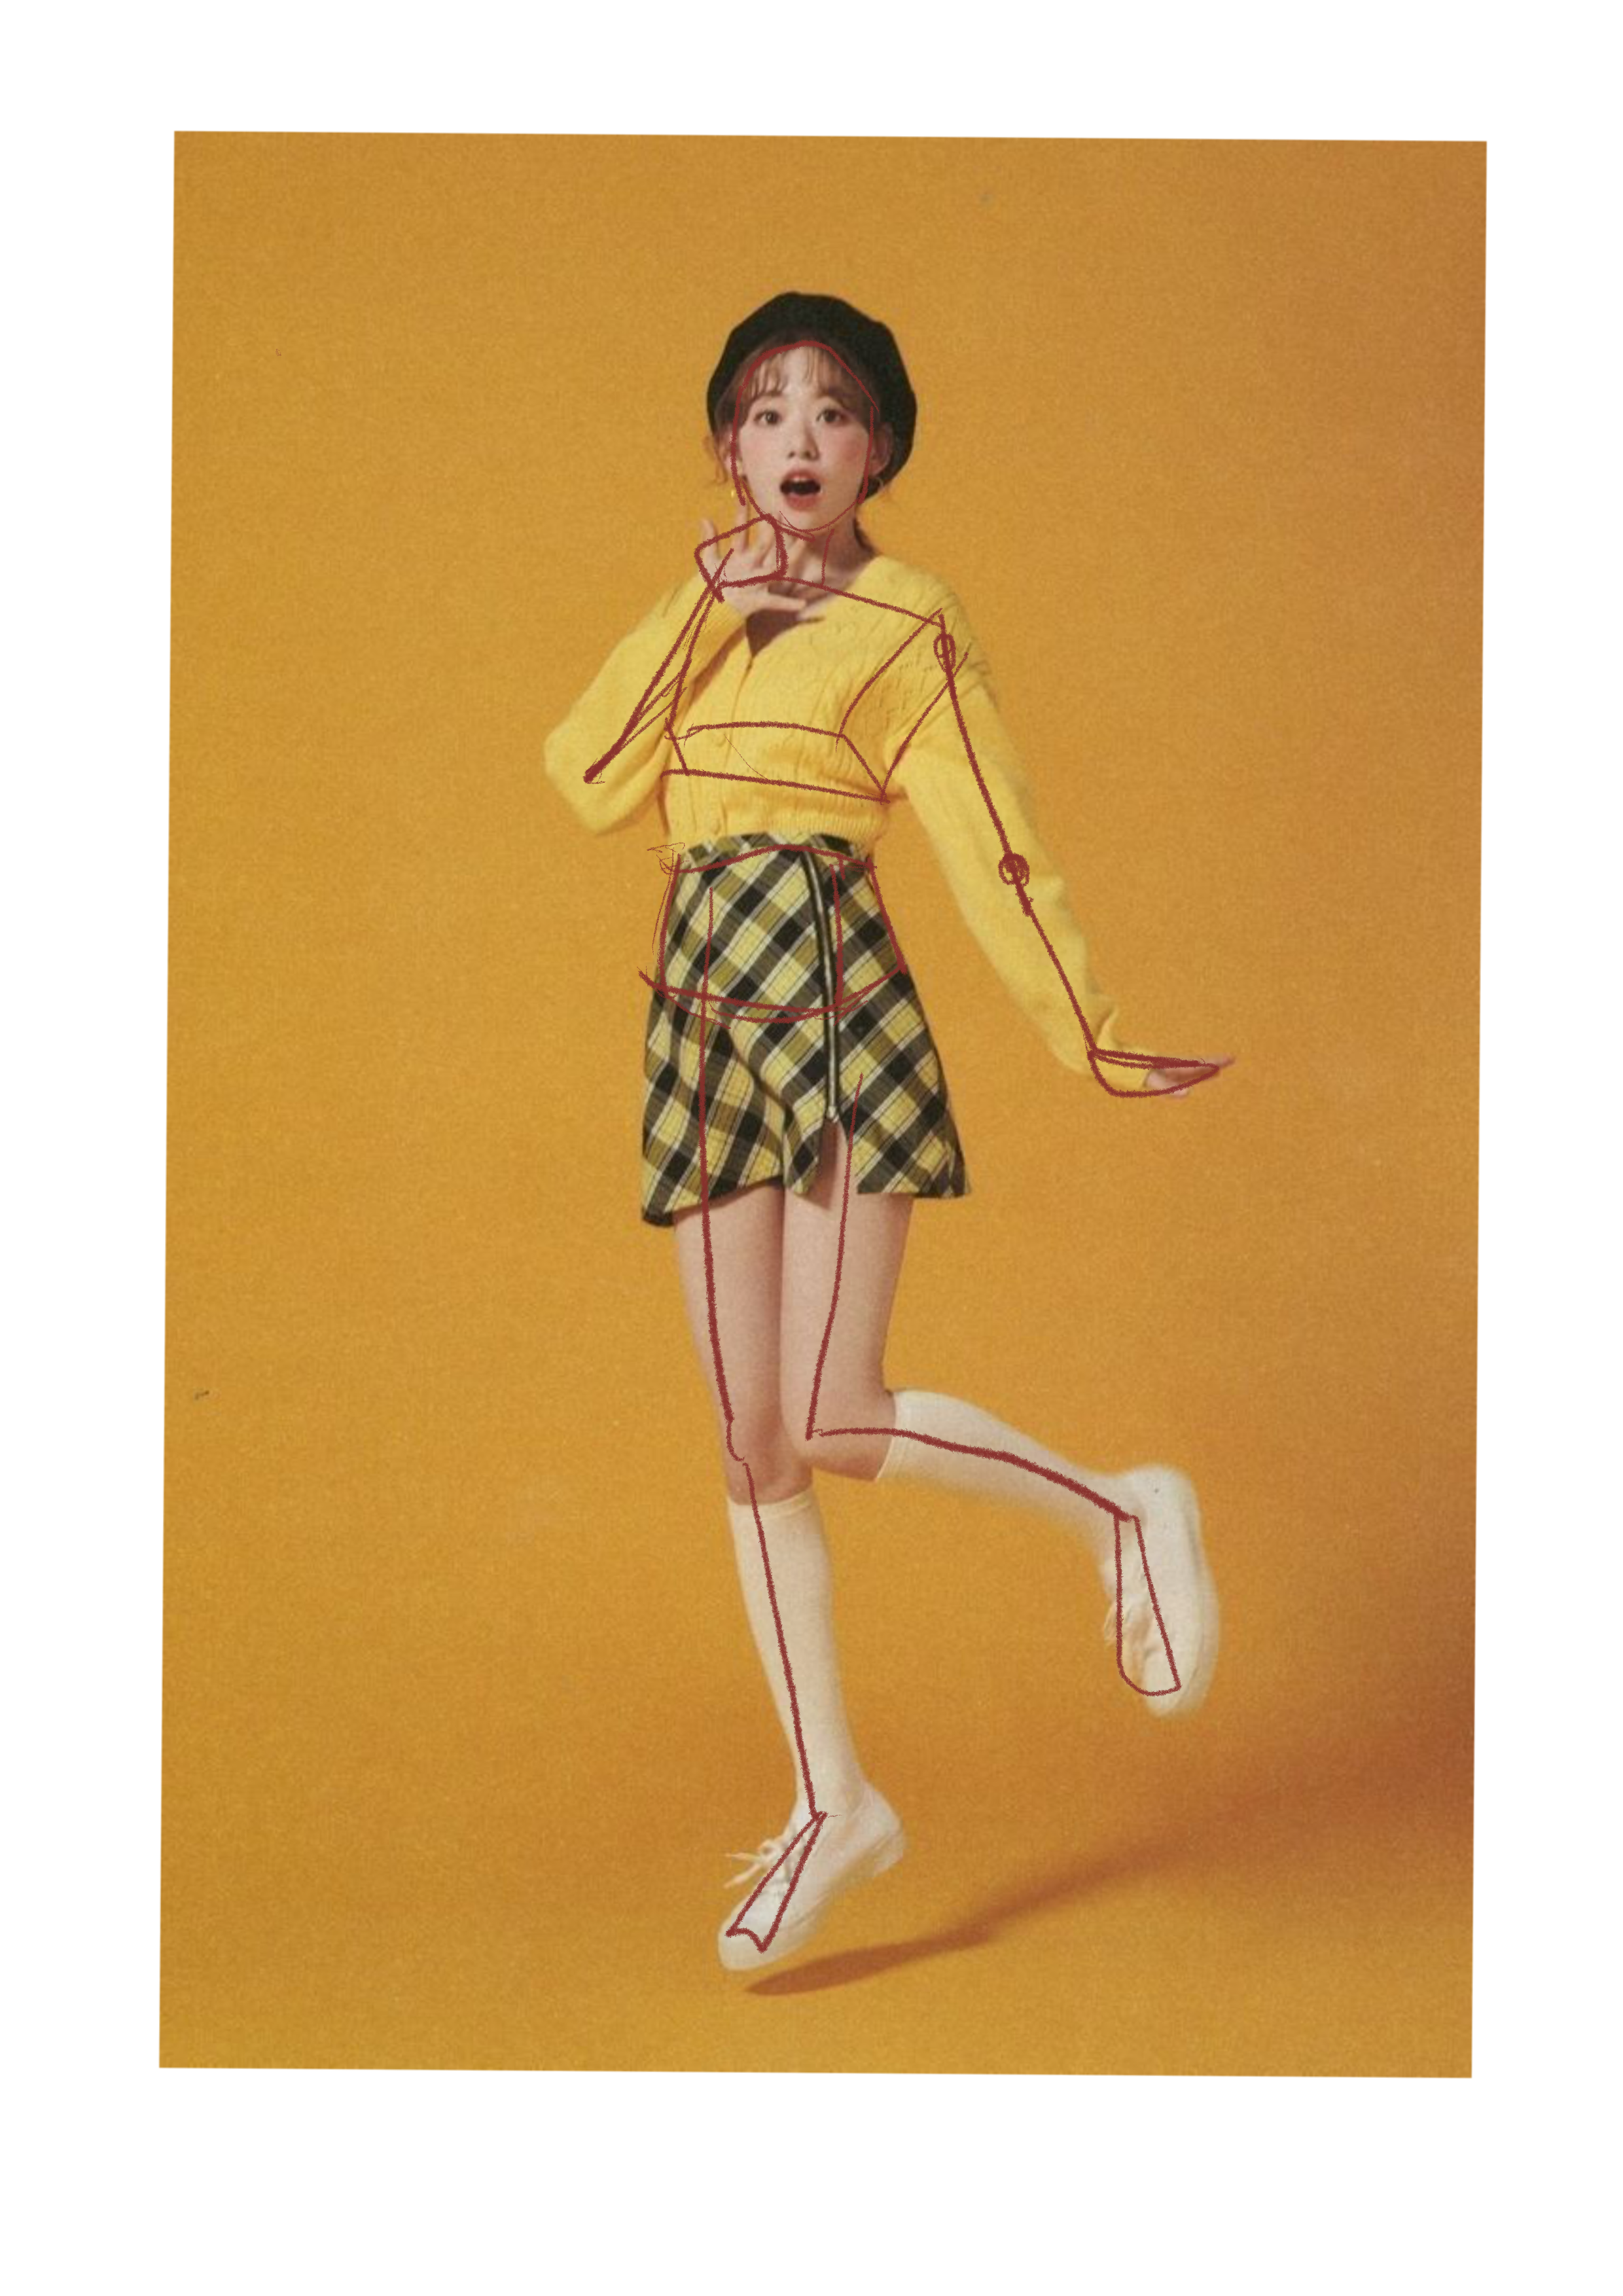
A strong foundation is essential in drawing from a reference photo. To achieve accurate proportions and movement, I first construct a simple skeleton framework:
- I break down the figure into basic shapes (circles, ovals, and lines) to map out the pose.
- I pay attention to the angles of the limbs and the overall balance of the figure.
- I use light strokes so I can easily refine the structure later.
By practicing this step consistently, you’ll develop a better understanding of anatomy and movement, making it one of the key drawing from reference good practice techniques. You can sketch it in your own style.
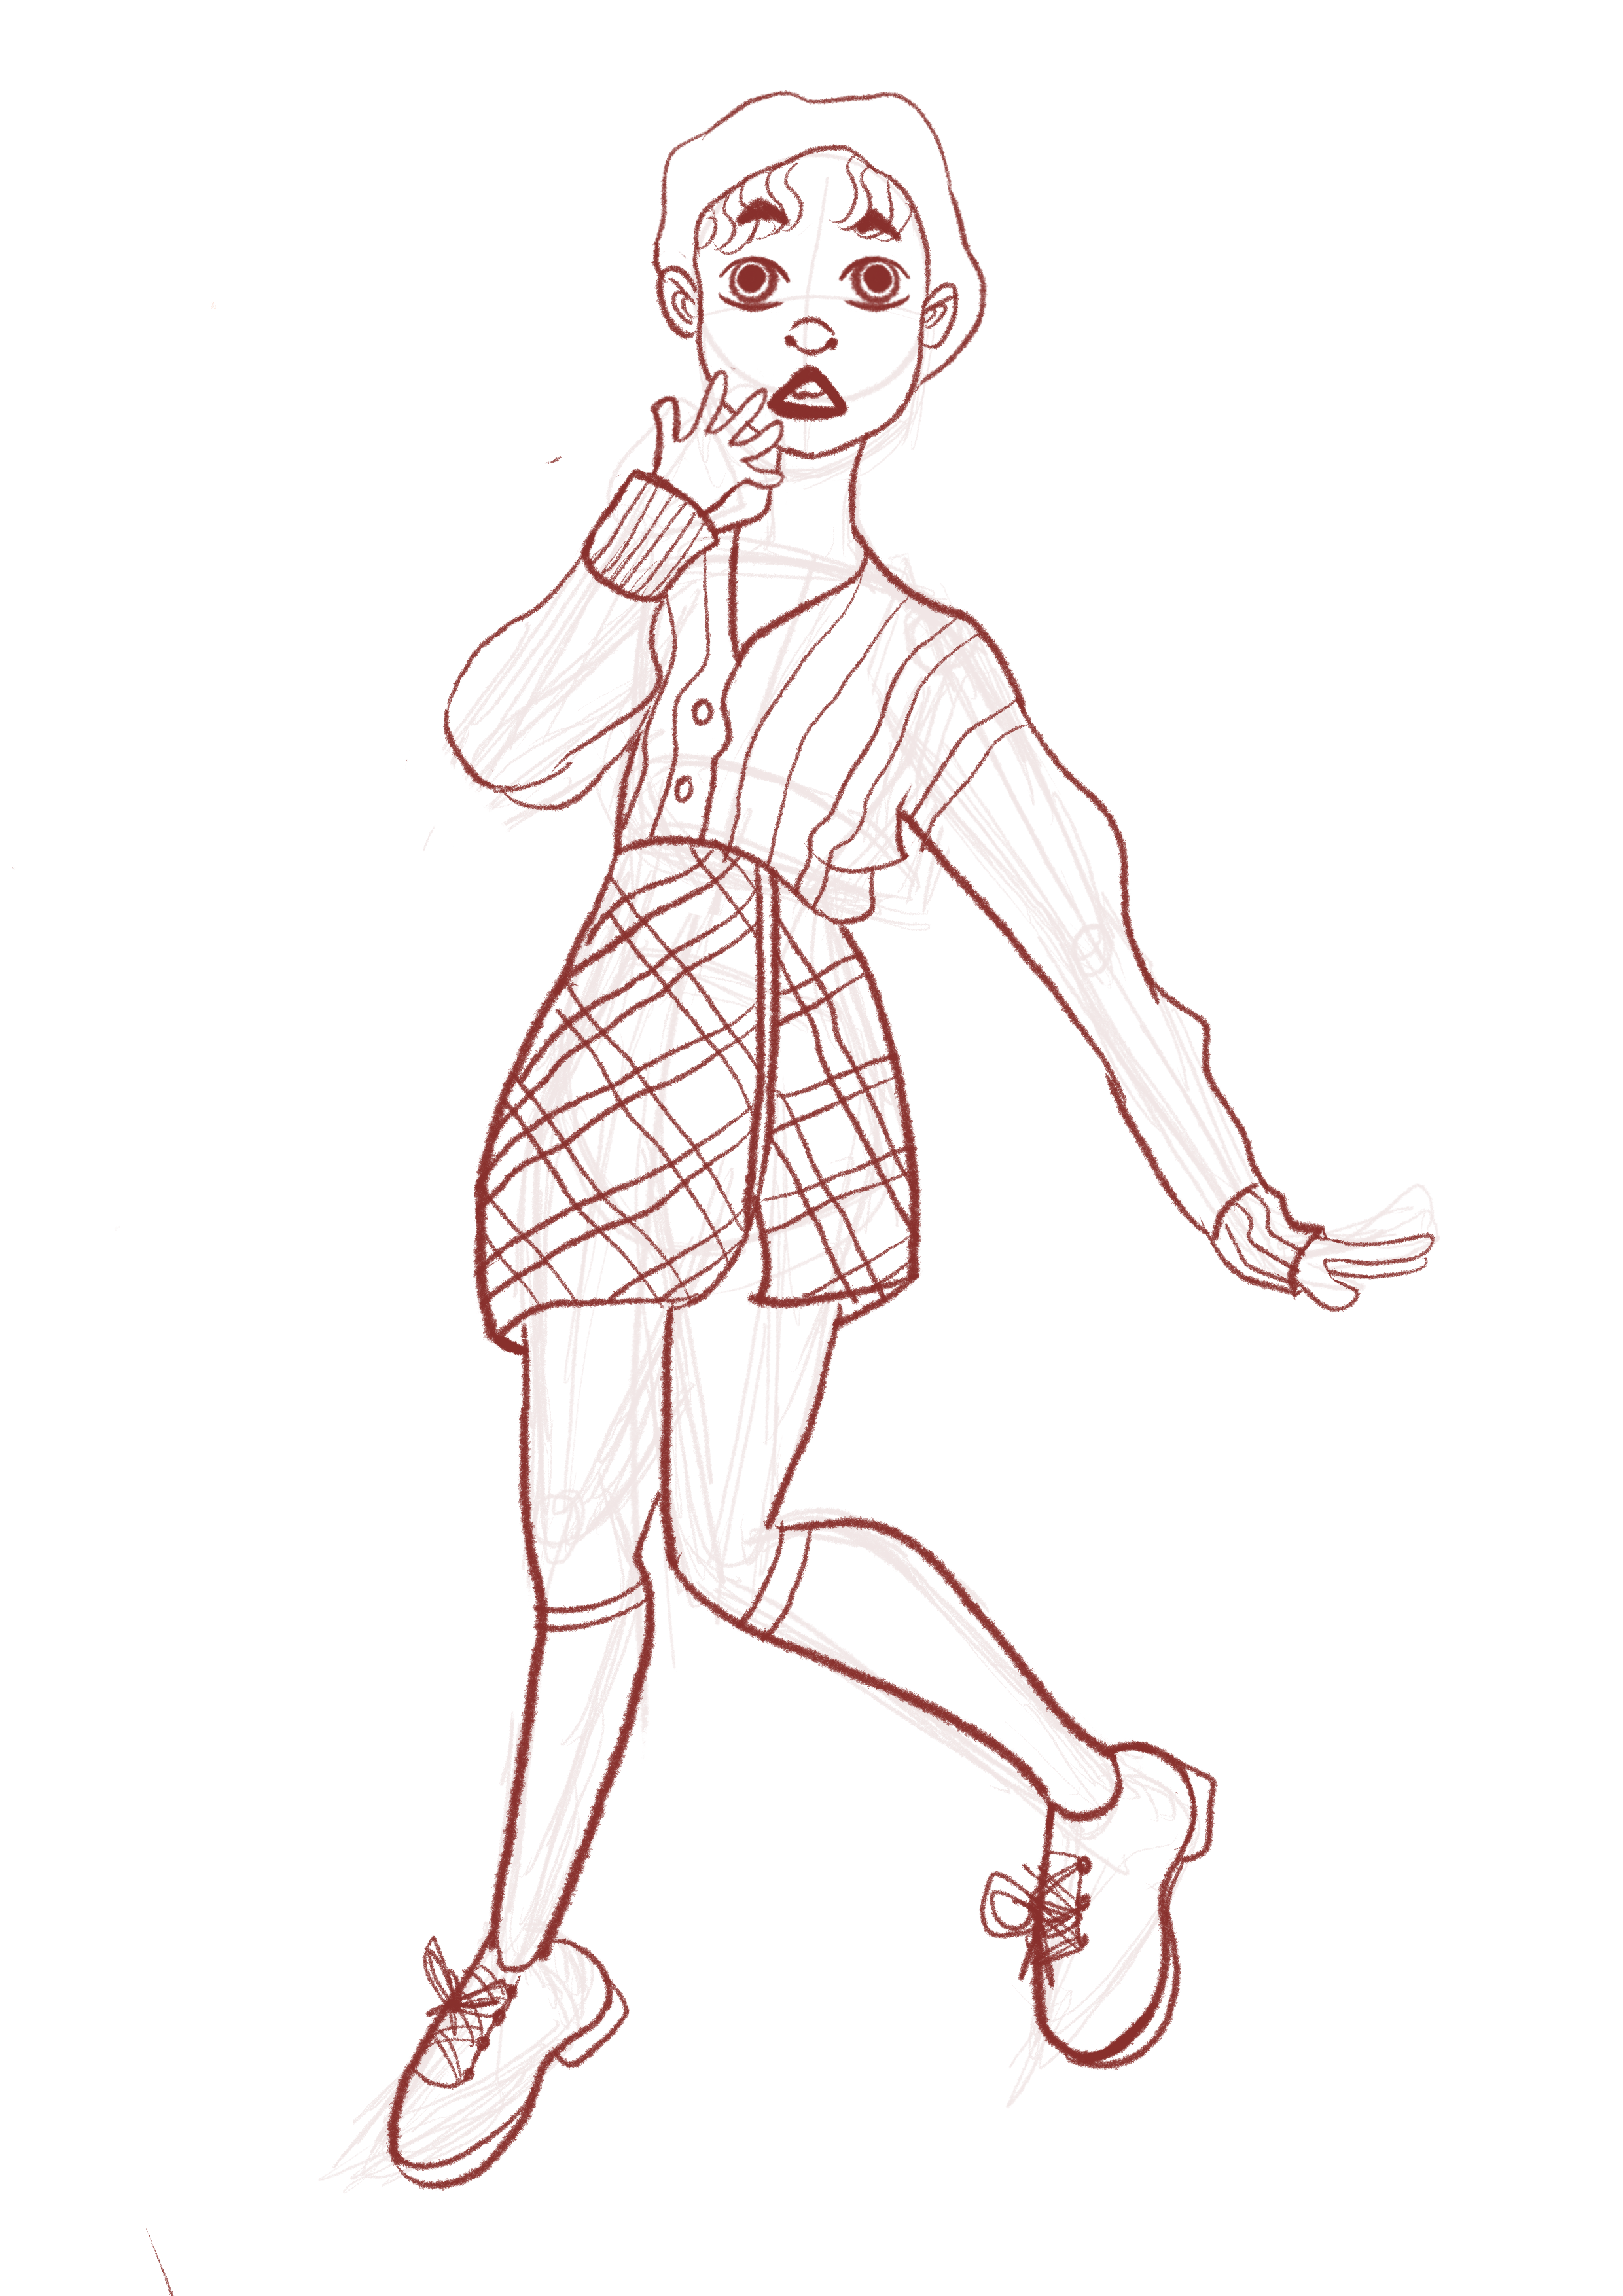
Step 3: Rough Sketch Over the Skeleton
Once the skeleton is in place, I move on to drawing the rough sketch. This is where I start defining the figure more clearly:
- I sketch out the muscle structure, arms, legs, hands, and feet.
- I begin to shape the face and draw the basic hairstyle.
- At this stage, the sketch is still loose and not overly detailed, allowing room for refinement later.
This step bridges the gap between raw structure and detailed line art, helping build volume and rhythm in the figure.
Step 4: Refining the Sketch
With the skeleton in place, I begin refining the sketch:
- I outline the body, adding muscle definition and clothing details.
- I refine facial features, keeping proportions accurate to the reference.
- I adjust any awkward angles or proportions to improve the flow of the drawing.
This stage is where you can start adding your own style while still respecting the reference. One of my favorite drawing from a reference tips is to analyze the reference rather than copy it exactly—this helps you create a more unique piece.
Step 4: Adding Colors and Shading
Coloring is one of my favorite parts of the process. Here’s how I do it:
- Base Colors: I start by blocking in flat colors for the skin, clothing, and background after making the opacity of the sketch layer down. This helps create a solid foundation before adding depth.

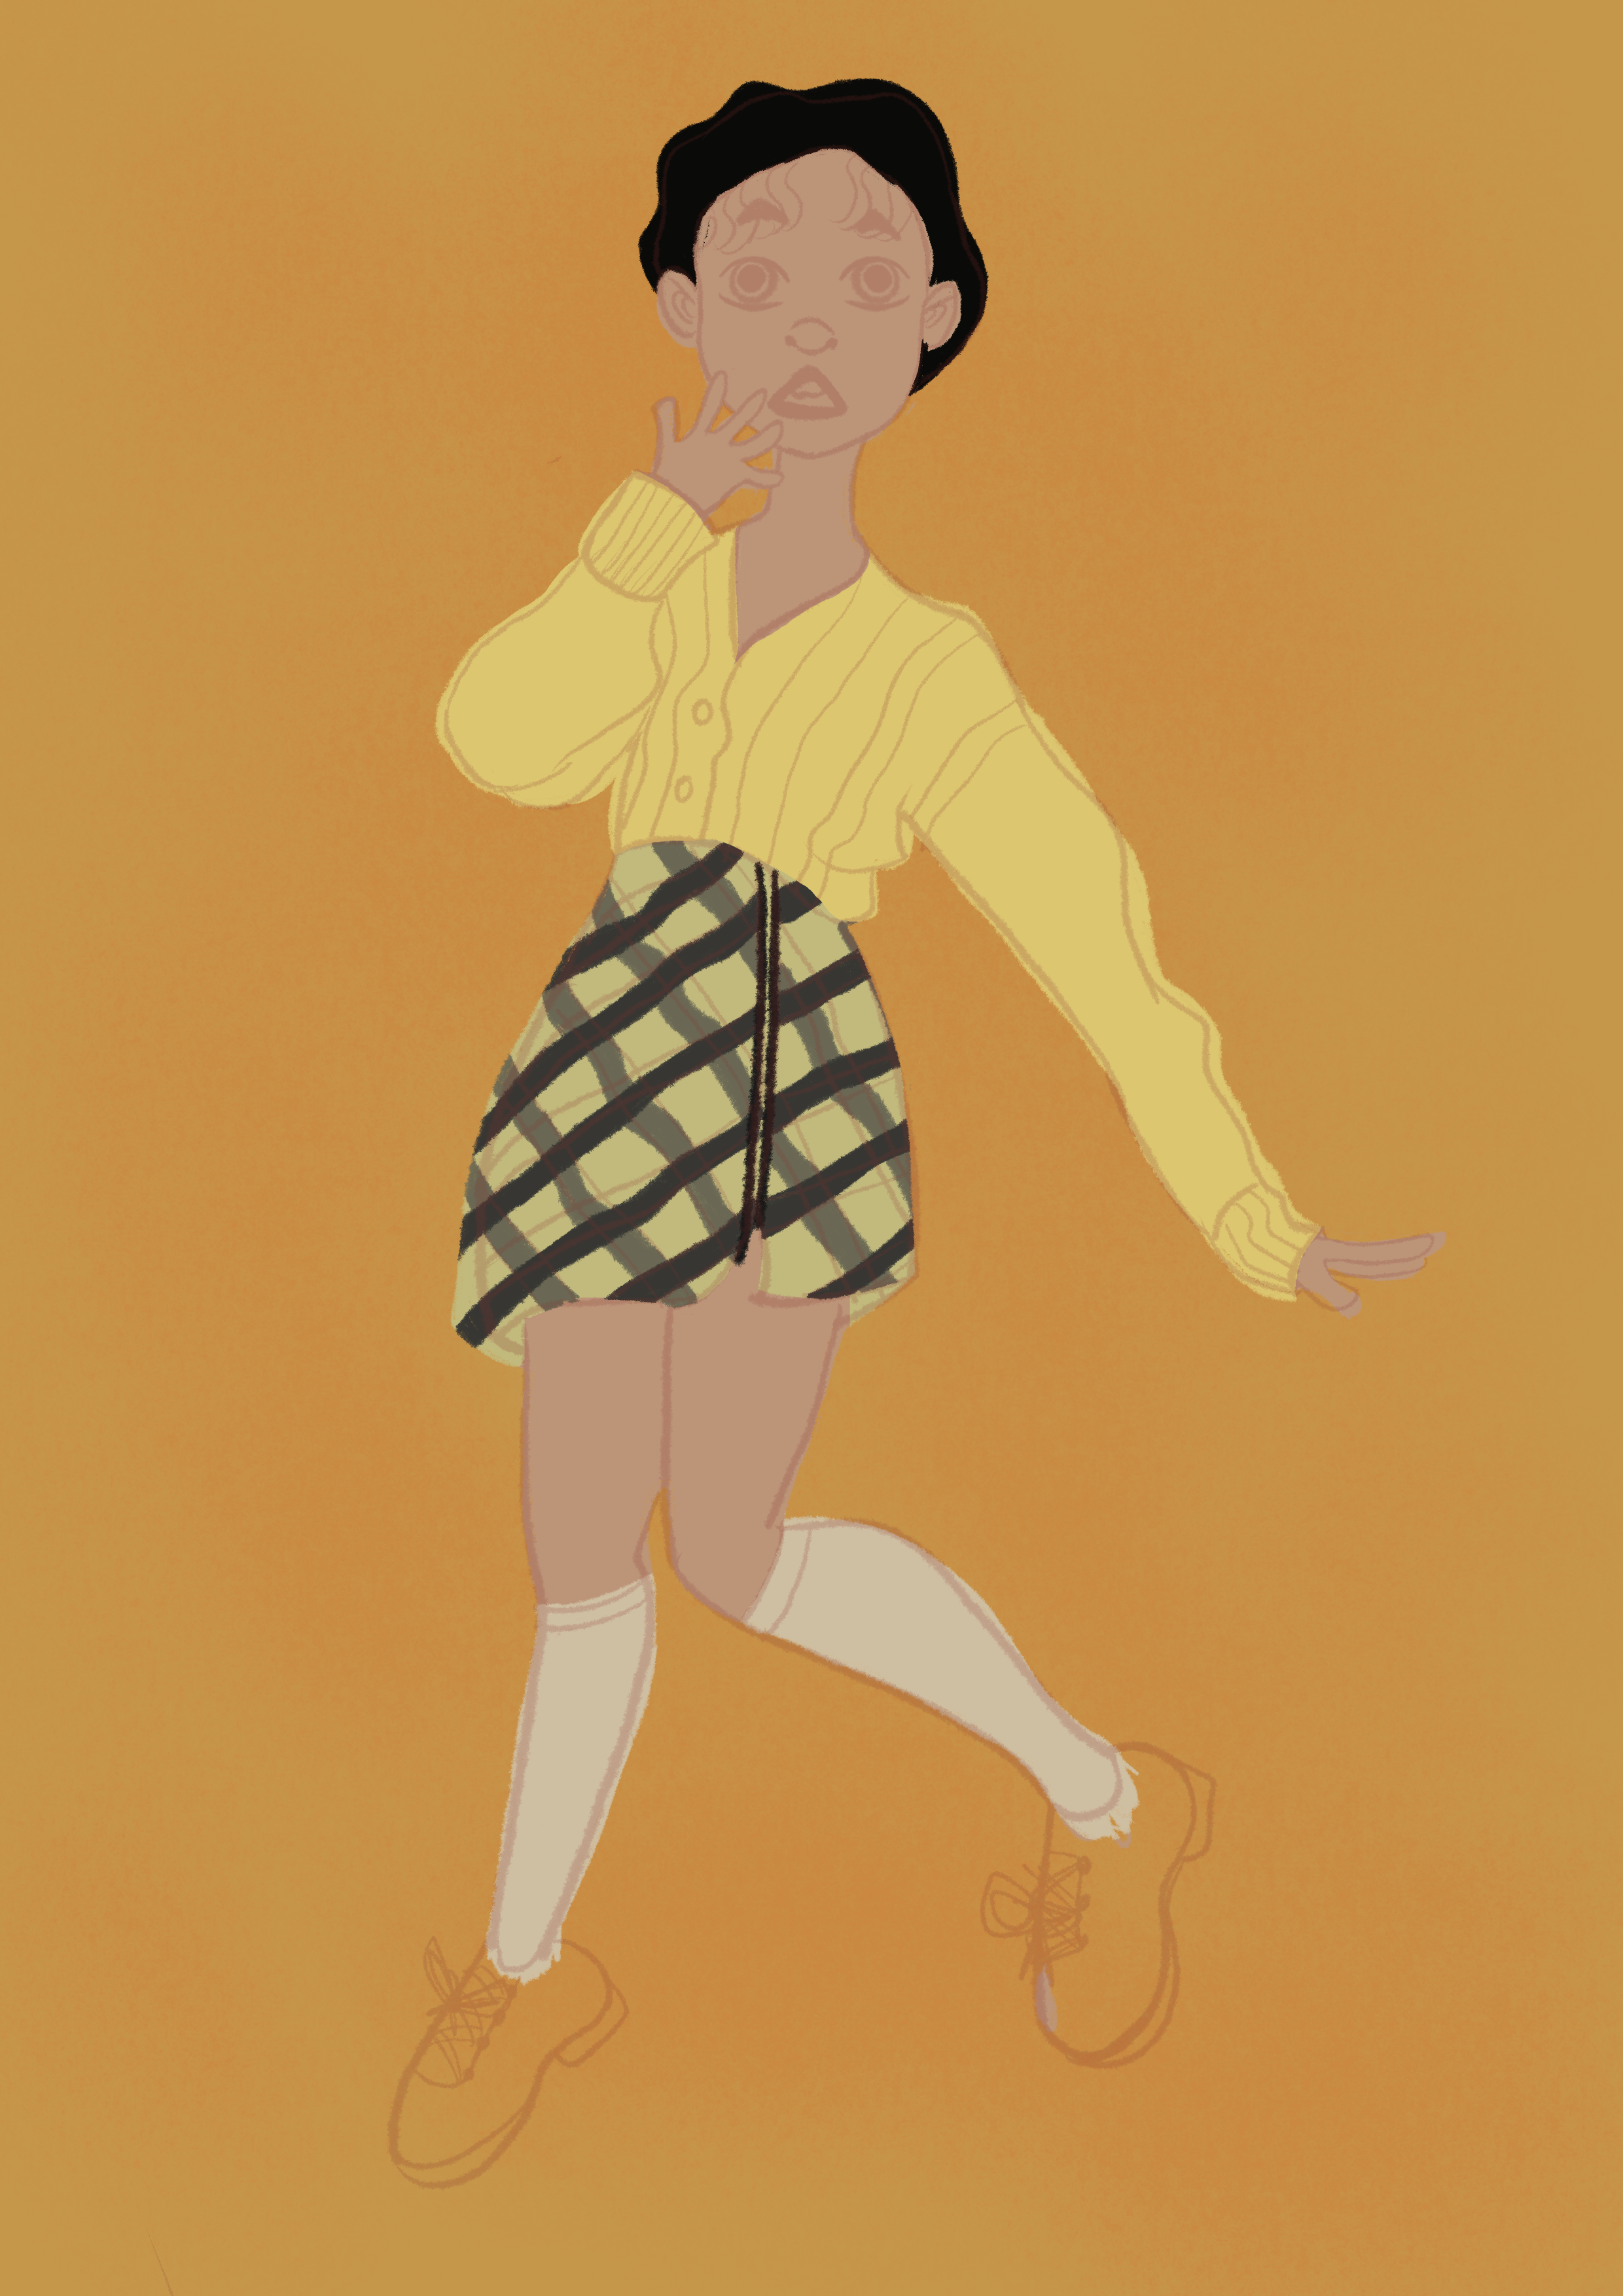
- Shadows and Highlights: To bring the illustration to life, I add shadows and highlights using soft brushes. I pay close attention to the lighting in the reference photo to ensure the shading is realistic.
- Blending and Refinement: I smooth out transitions between colors and add more defined details, like textures in clothing and subtle gradients on the skin.
- Final Touches: I enhance the contrast, adjust saturation, and sometimes add effects like a soft glow to make the artwork more polished and visually appealing.
Understanding light sources and how they interact with different surfaces is another drawing from reference good practice that elevates the quality of your work.
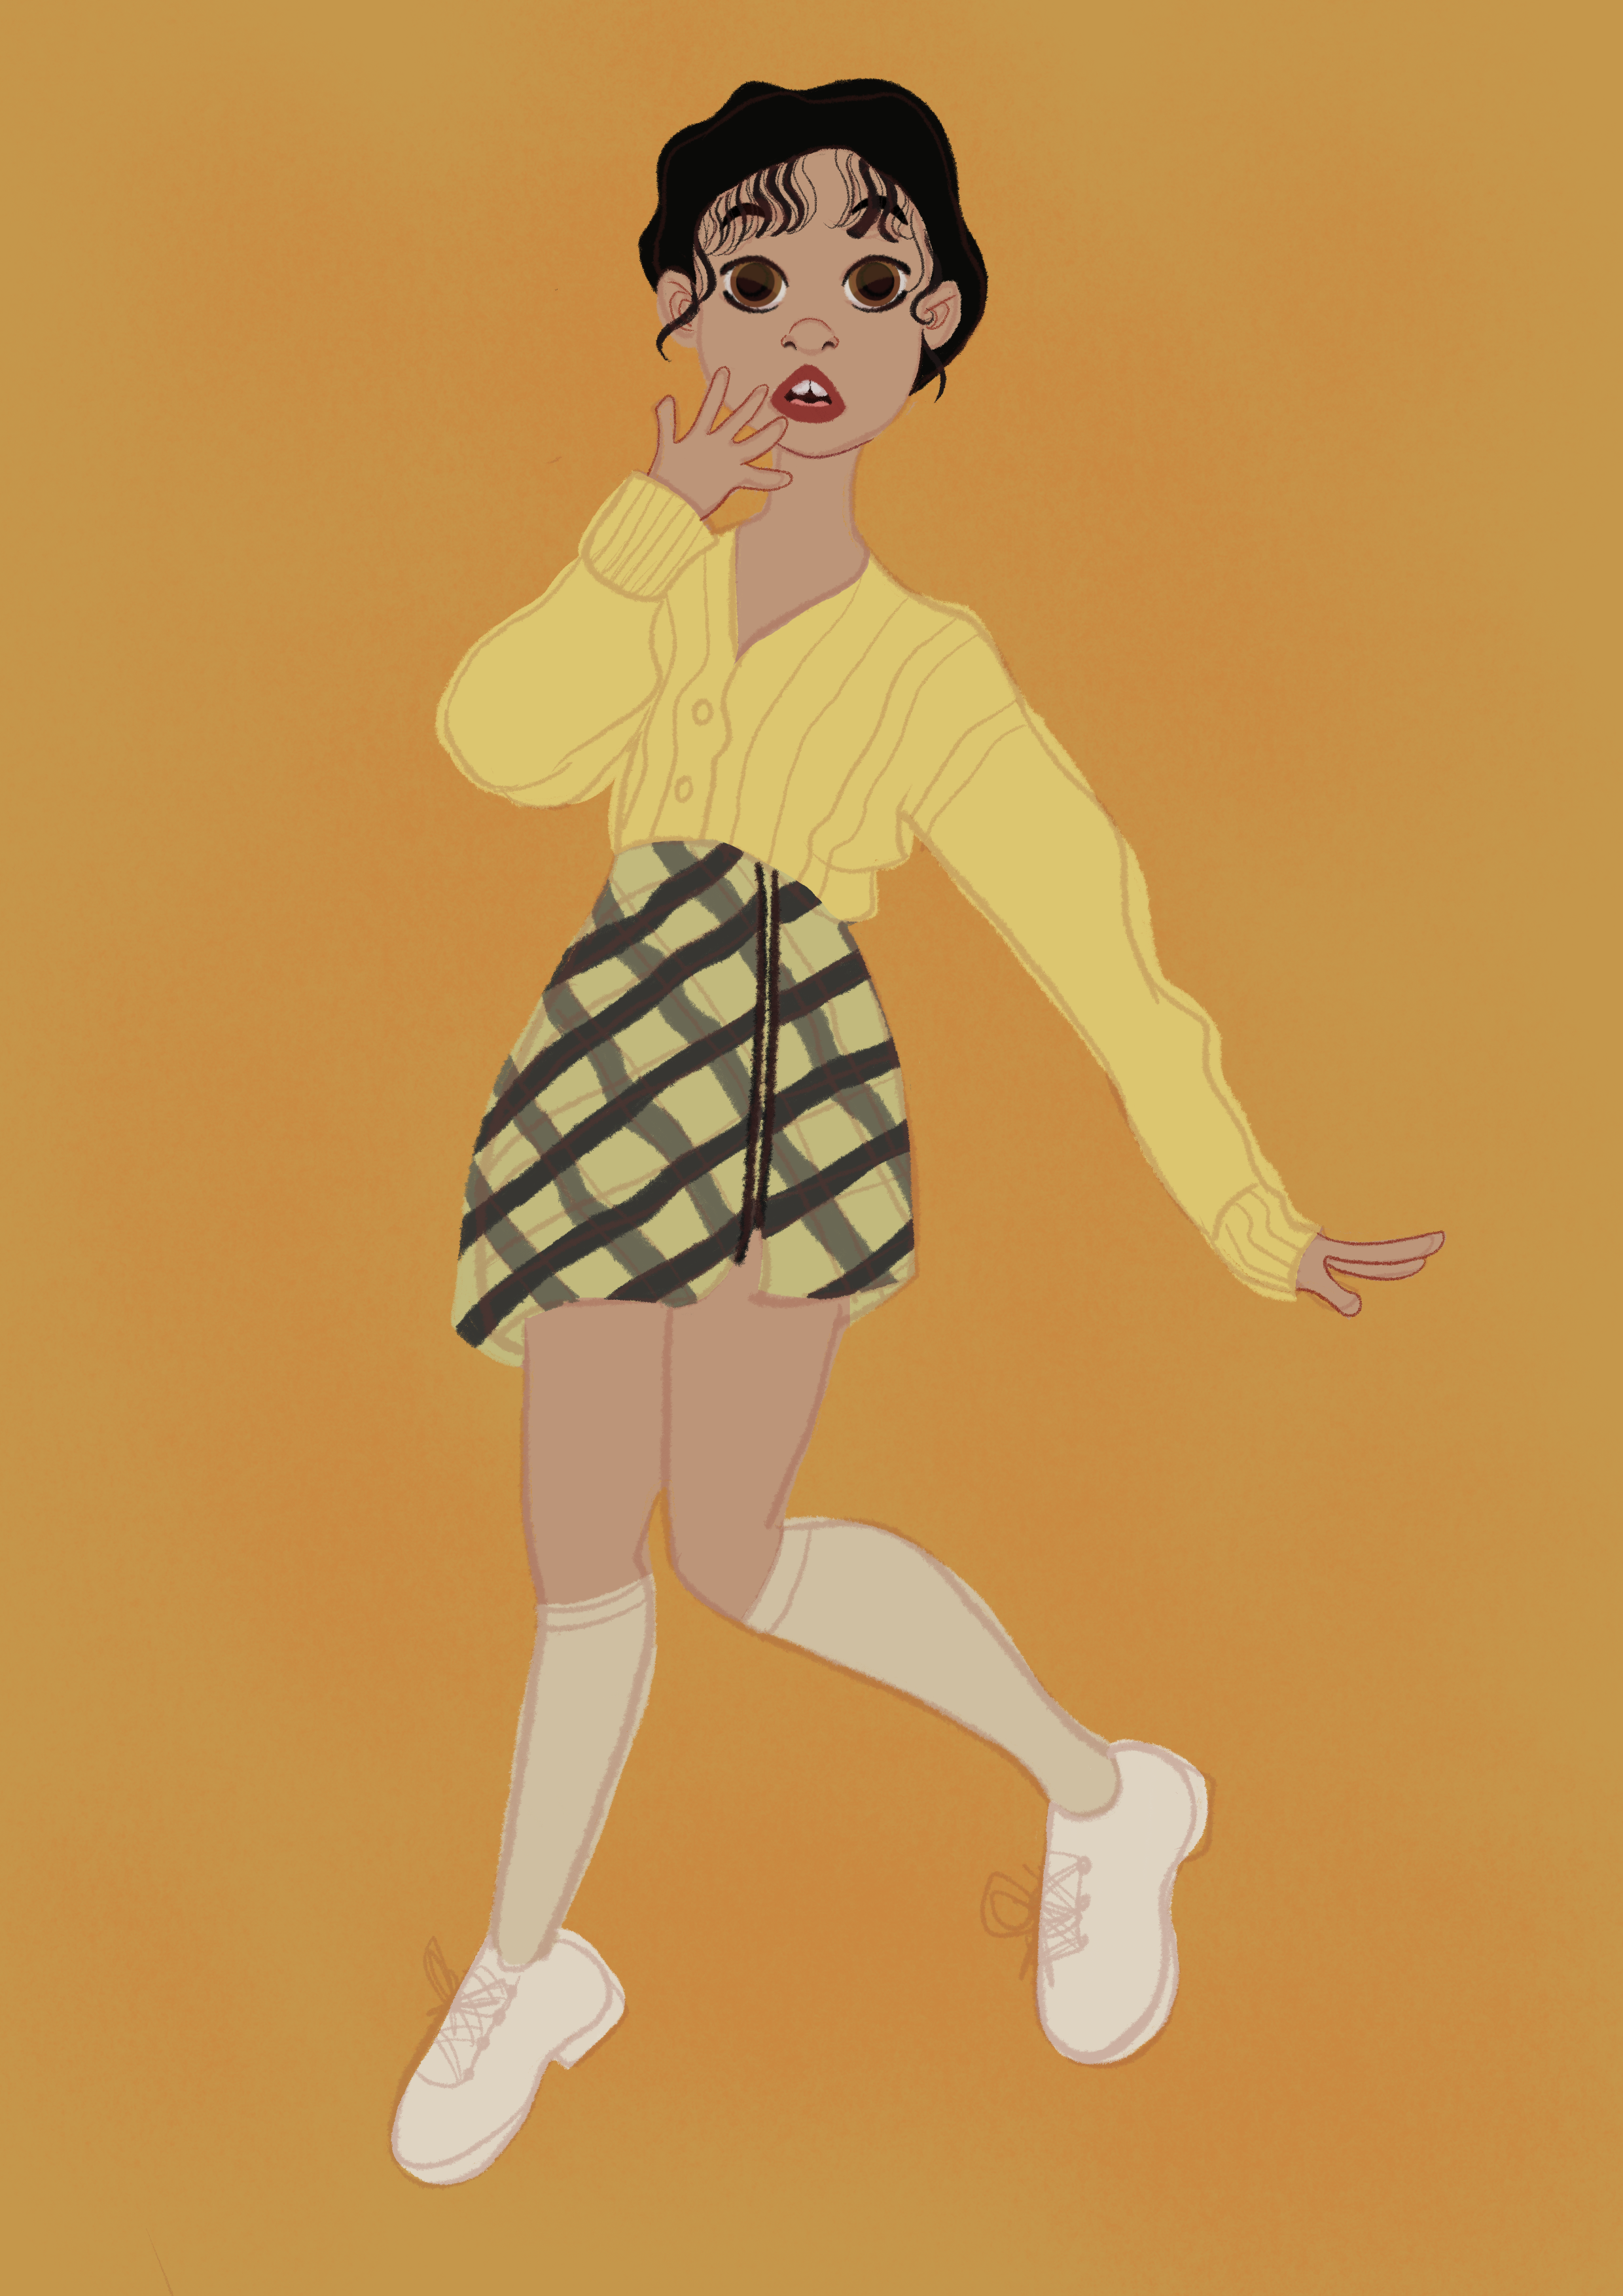
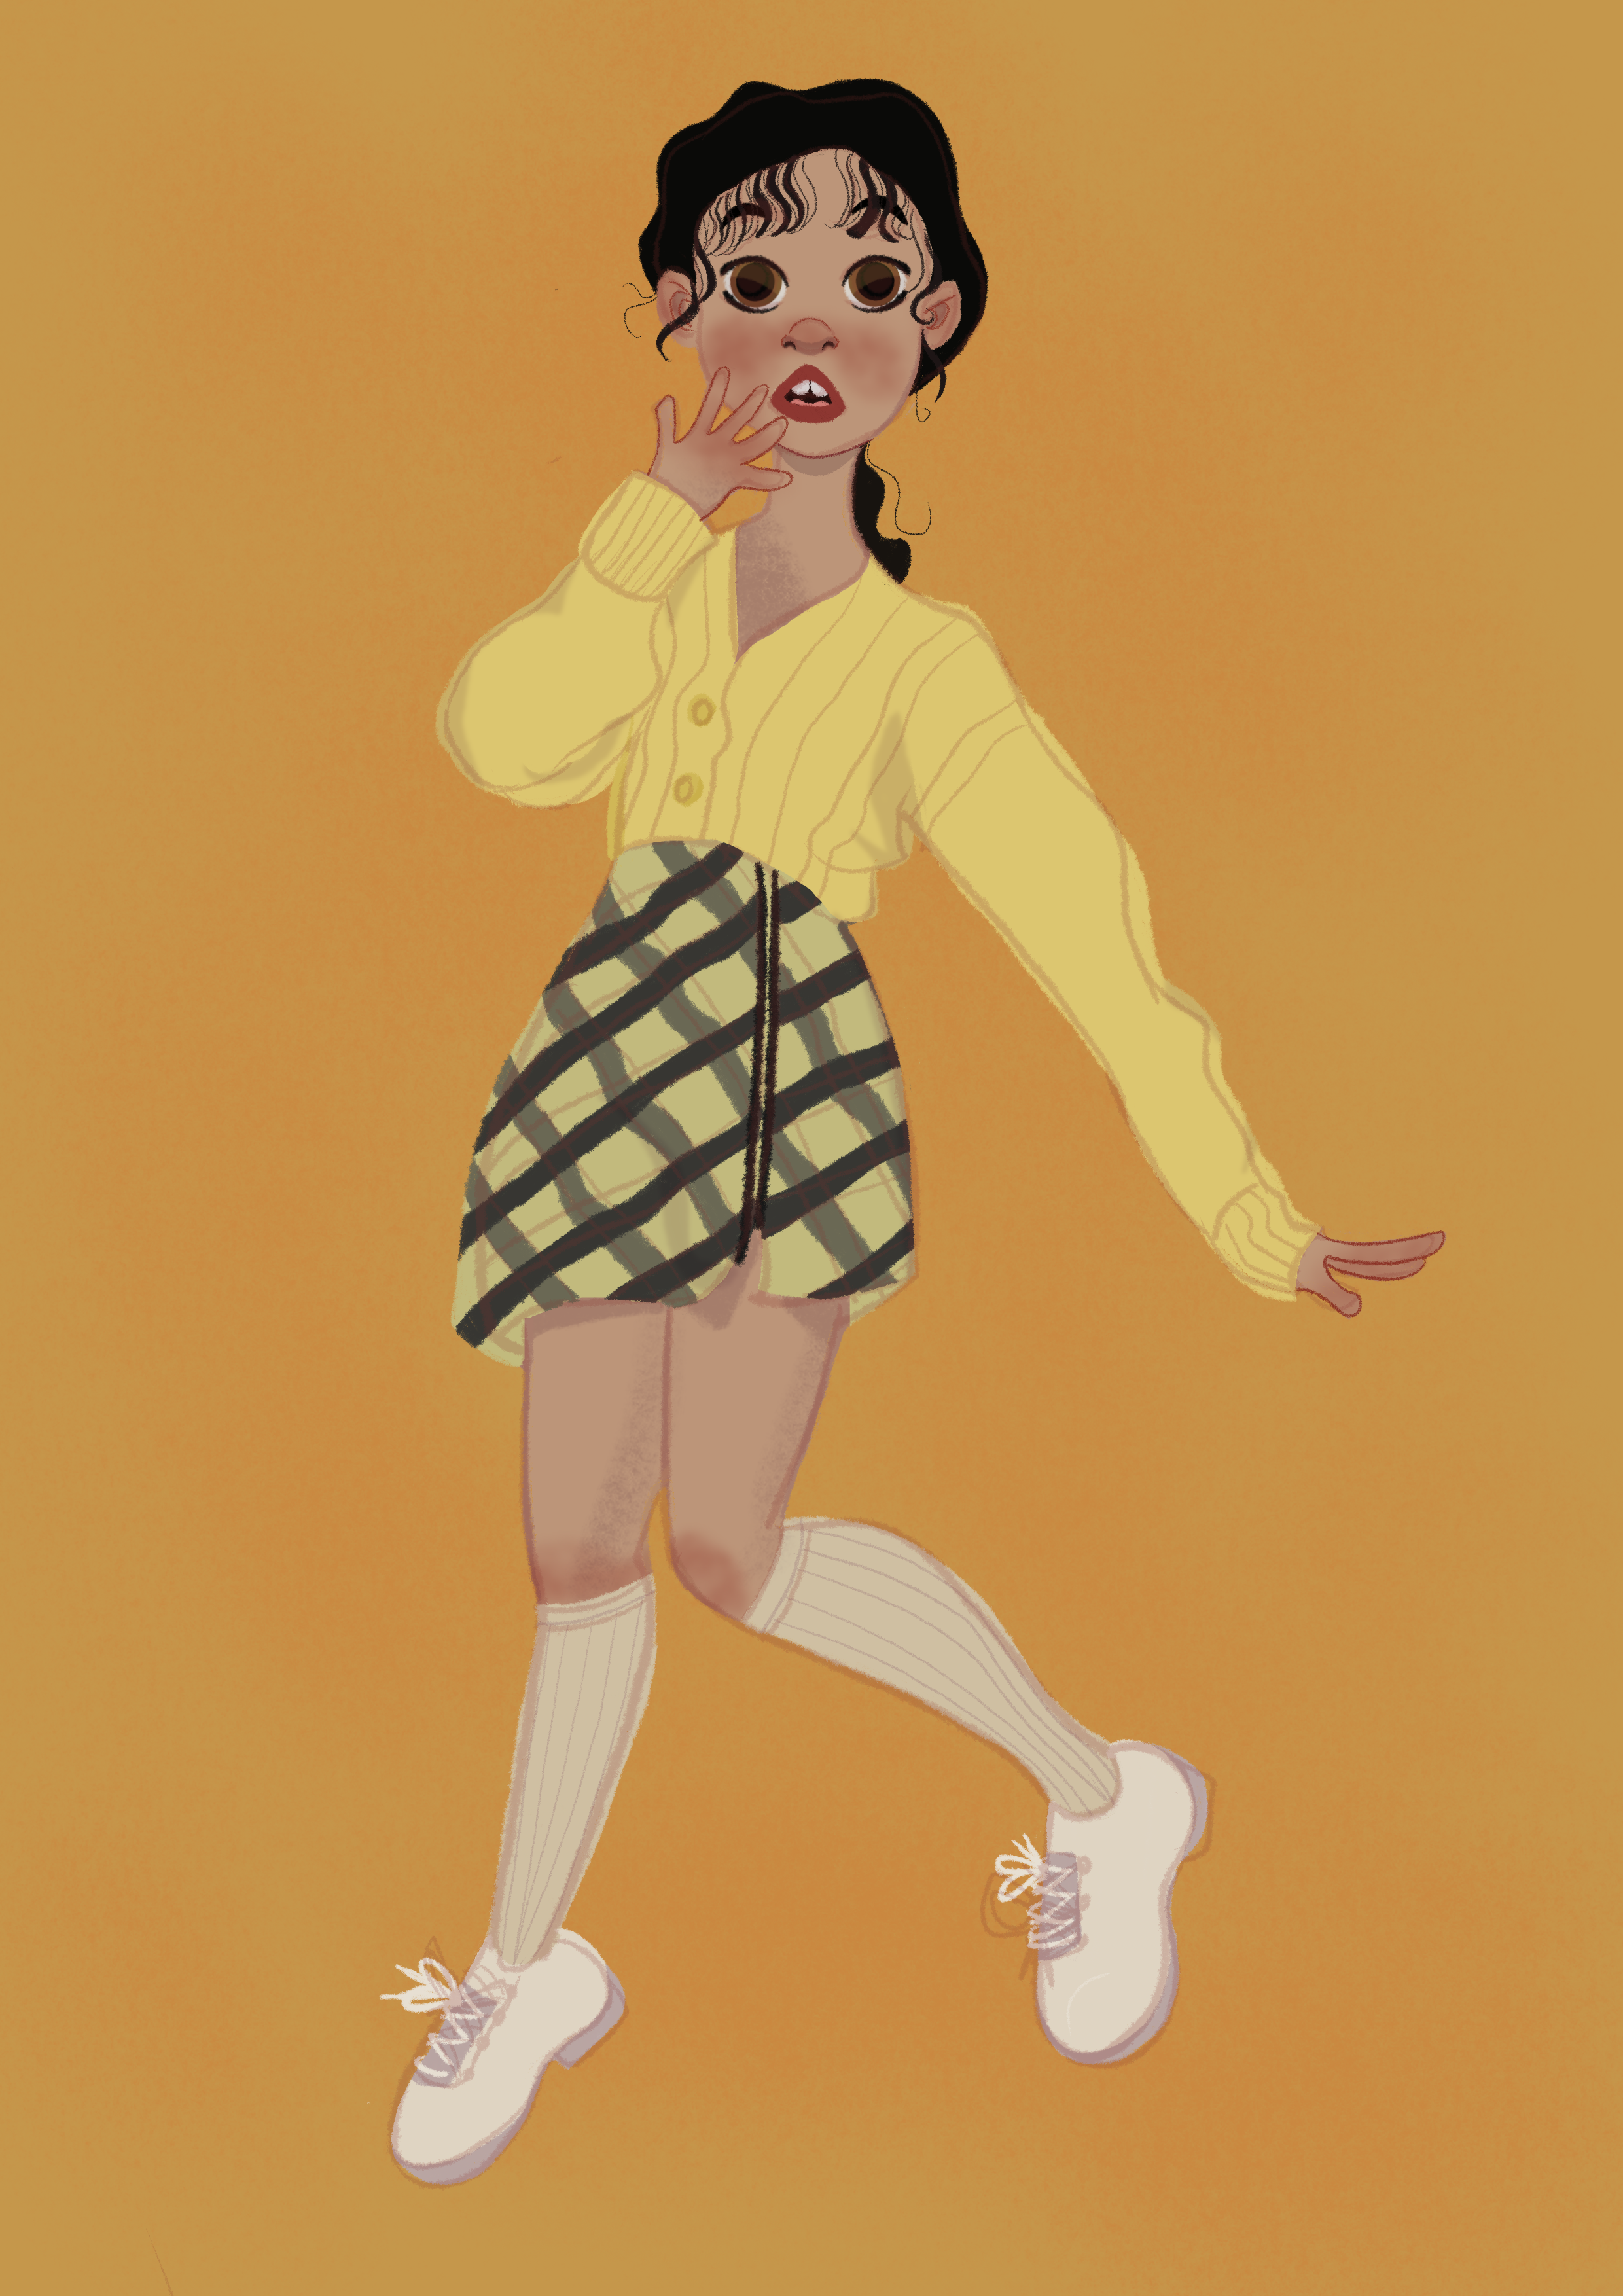
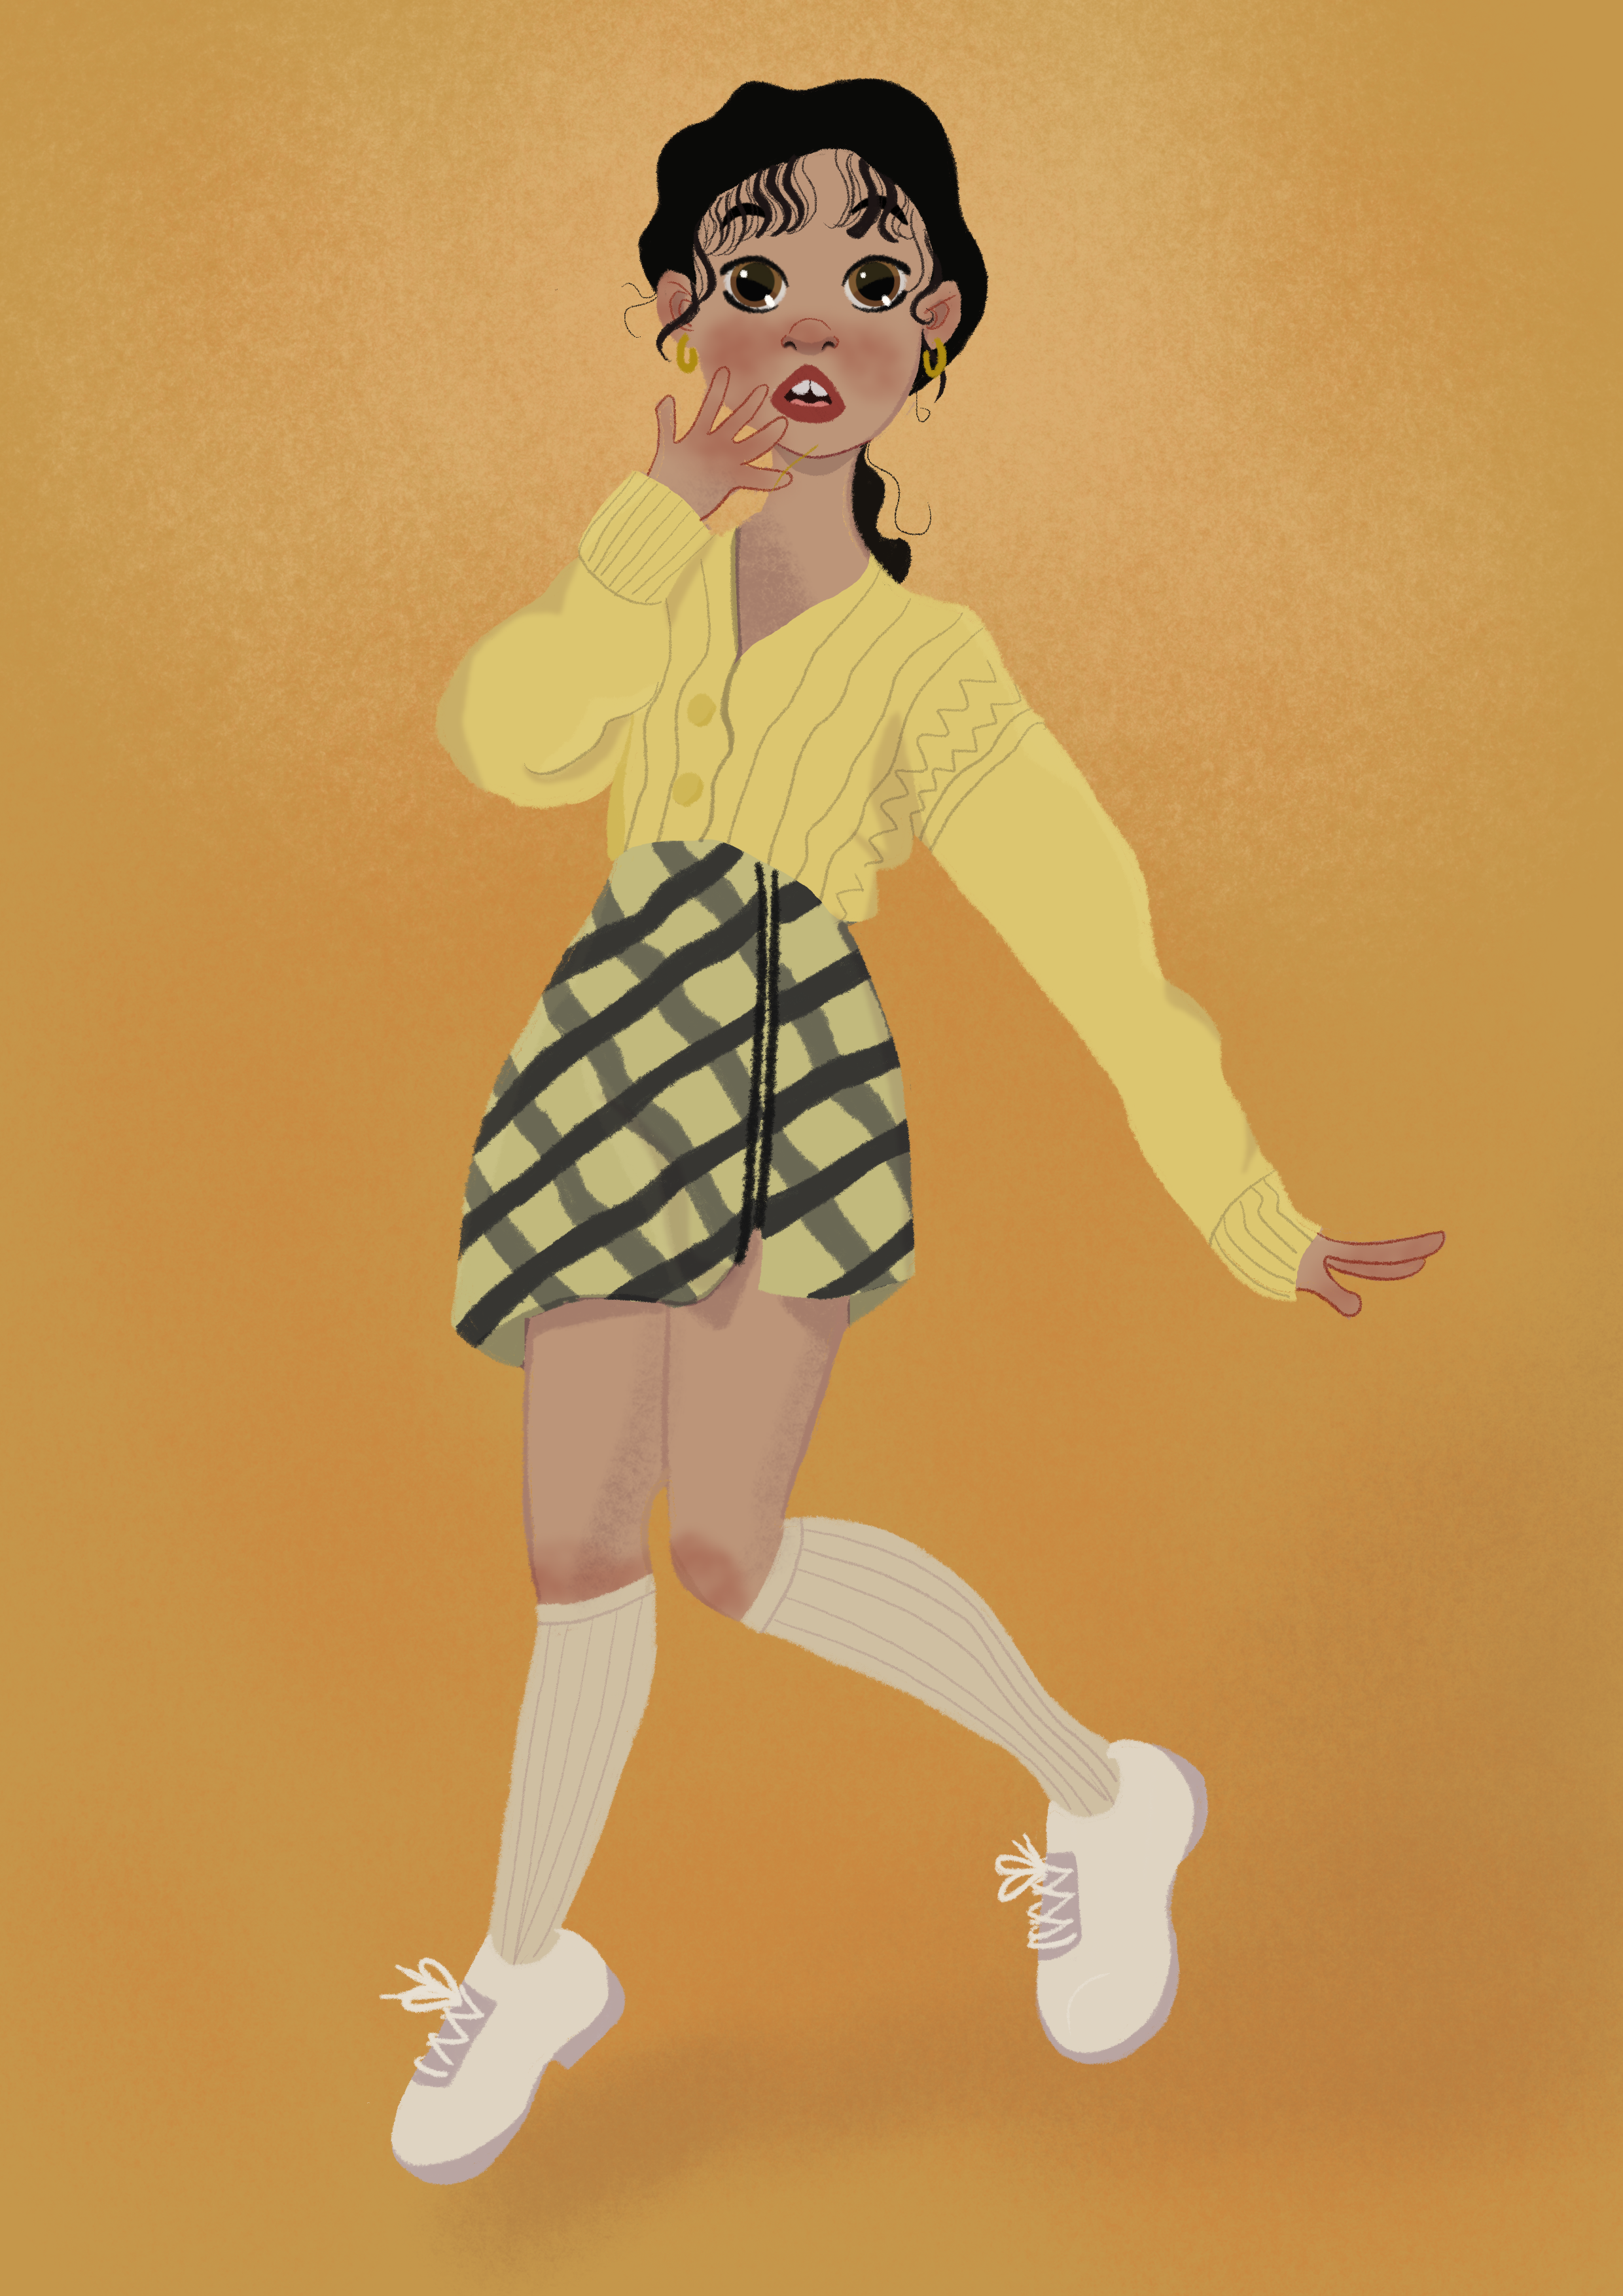
Step 5: Final Details and Adjustments
At this stage, I zoom in to refine details such as hair strands, fabric folds, and facial expressions. This is also when I make any necessary adjustments to improve the overall composition. Once I’m happy with the final look, I save the artwork and share it online!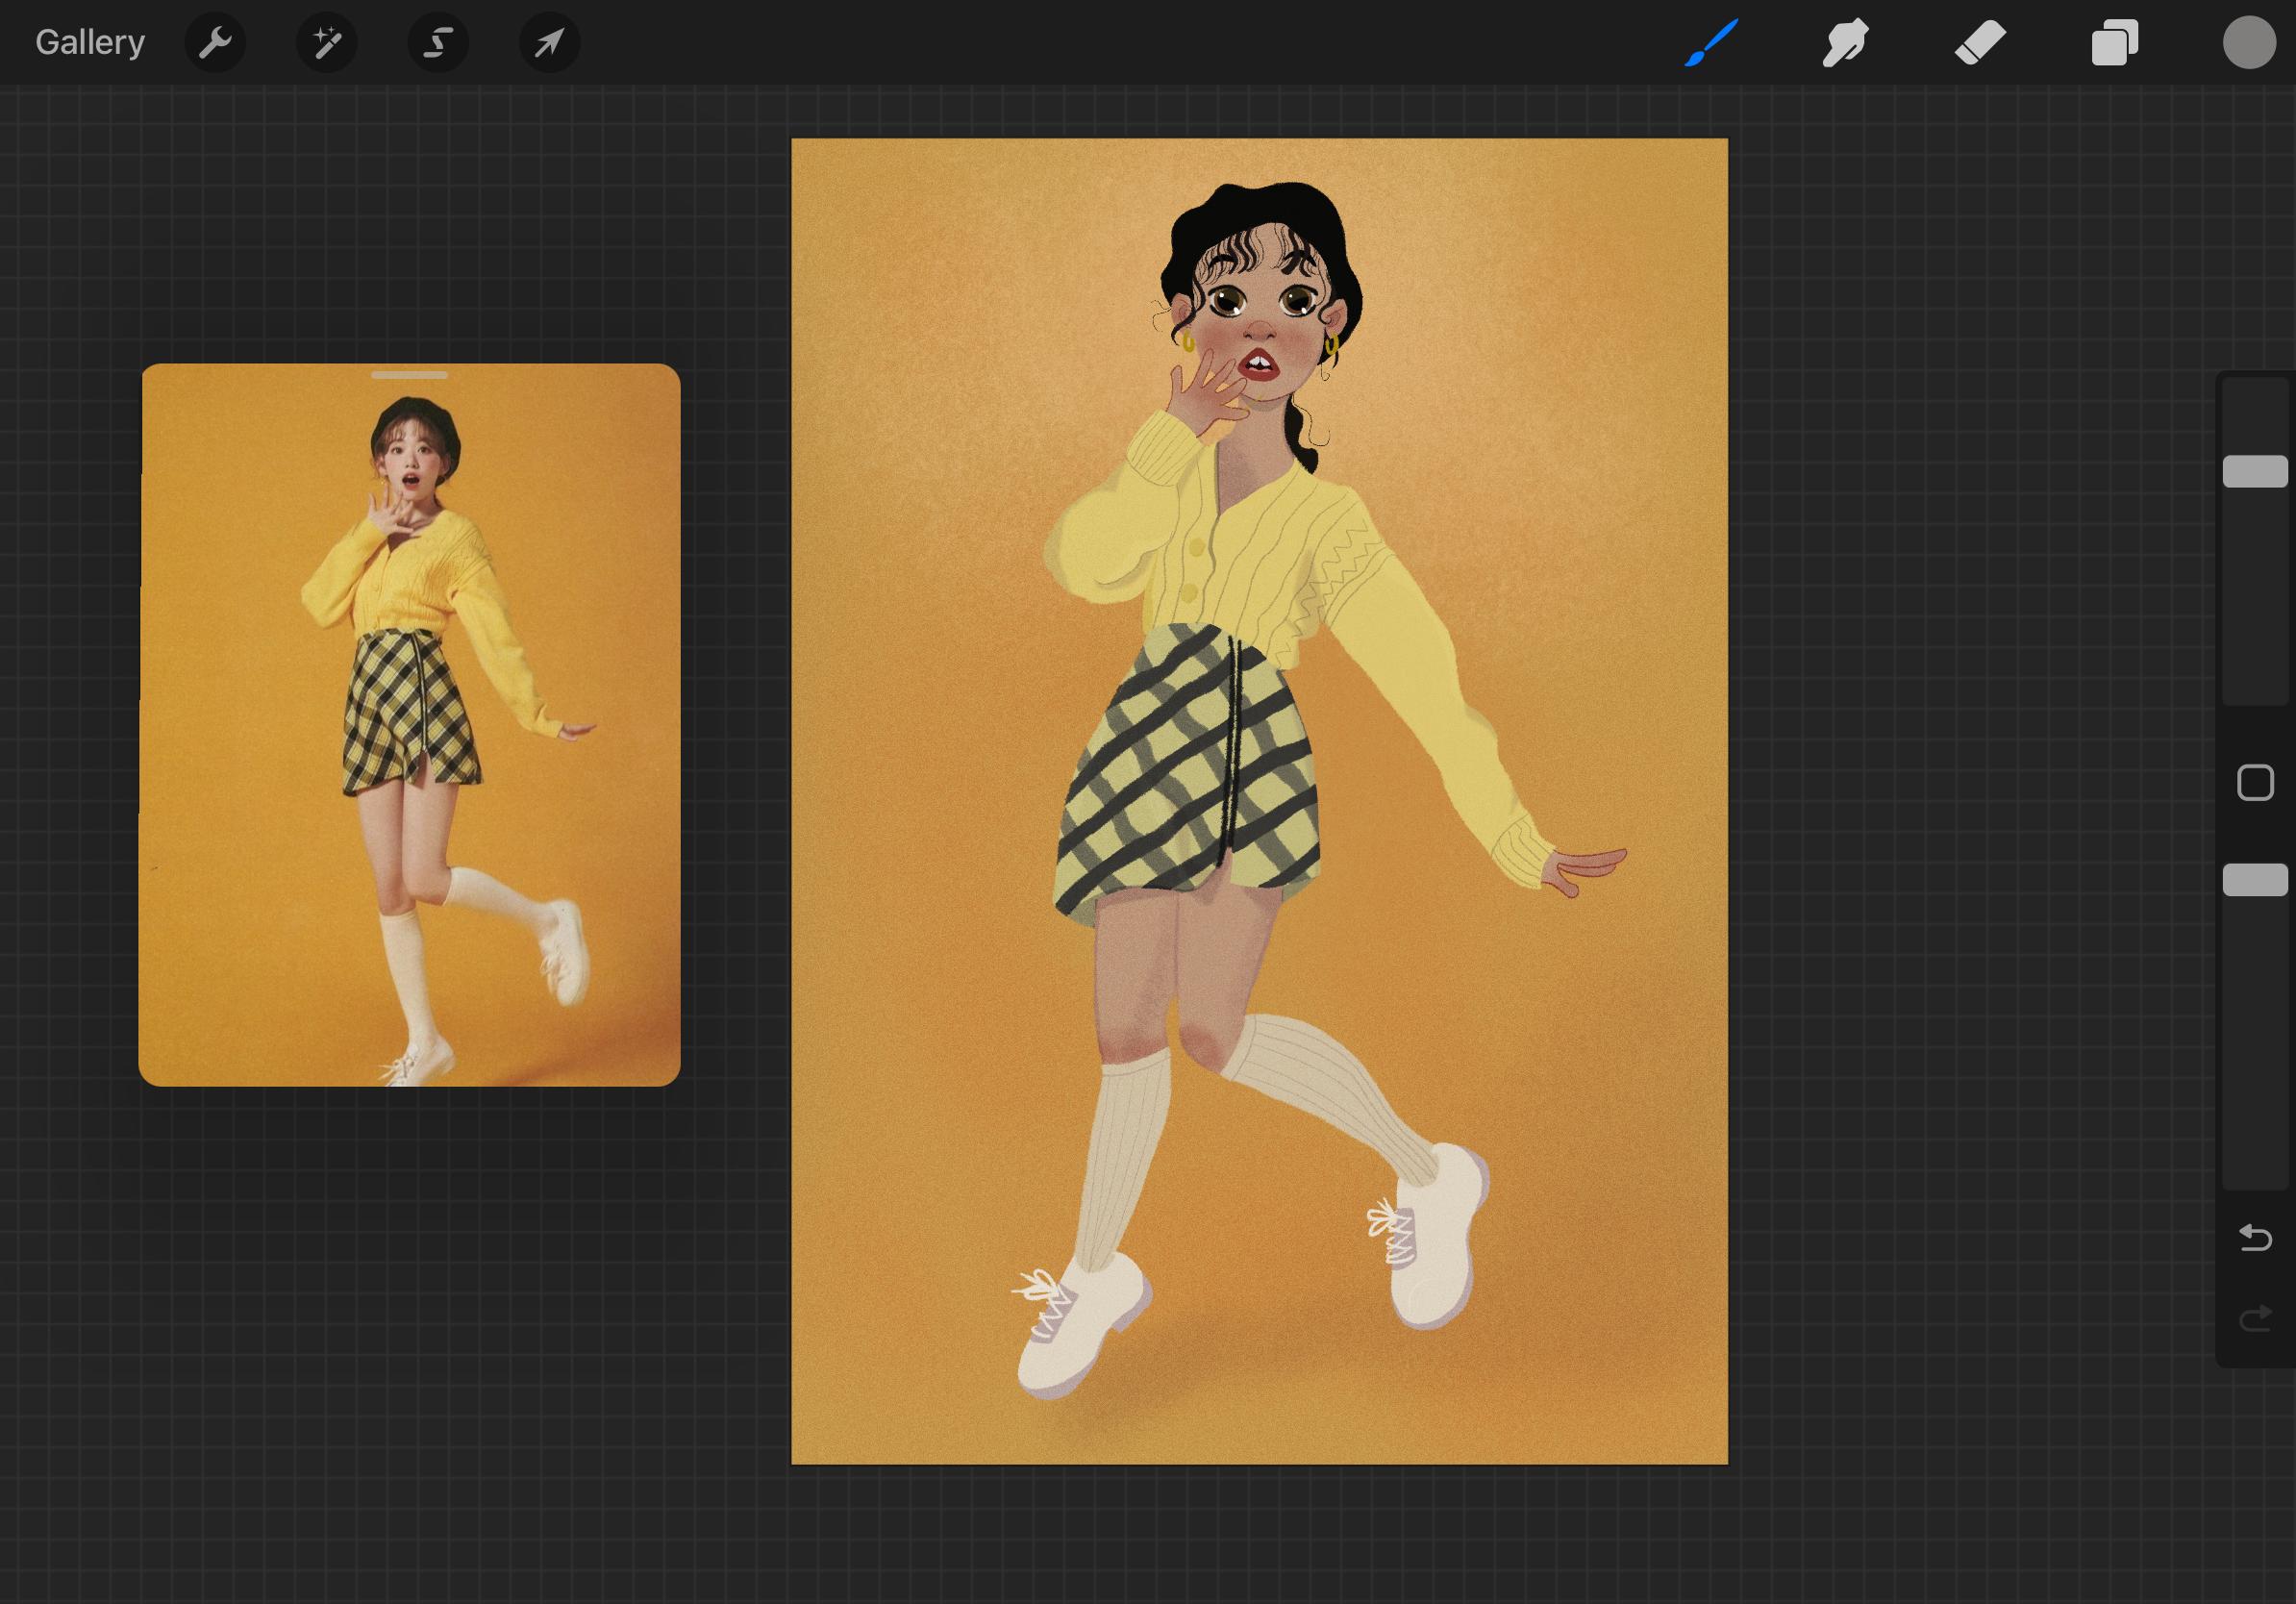
Digital Art from a Reference Photo: Tips for Success
When creating digital art, a reference photo can serve as a guide for both realistic and stylized artwork. Here are some tips specifically for digital artists:
- Use Side-by-Side Reference Mode
Instead of overlaying, keep your reference photo visible next to your canvas—either in a split-screen setup or in a floating window if your art software allows it. This method helps you train your eye to observe and replicate, rather than rely on tracing. It encourages more mindful observation of proportions, lighting, and details, which leads to stronger artistic growth over time.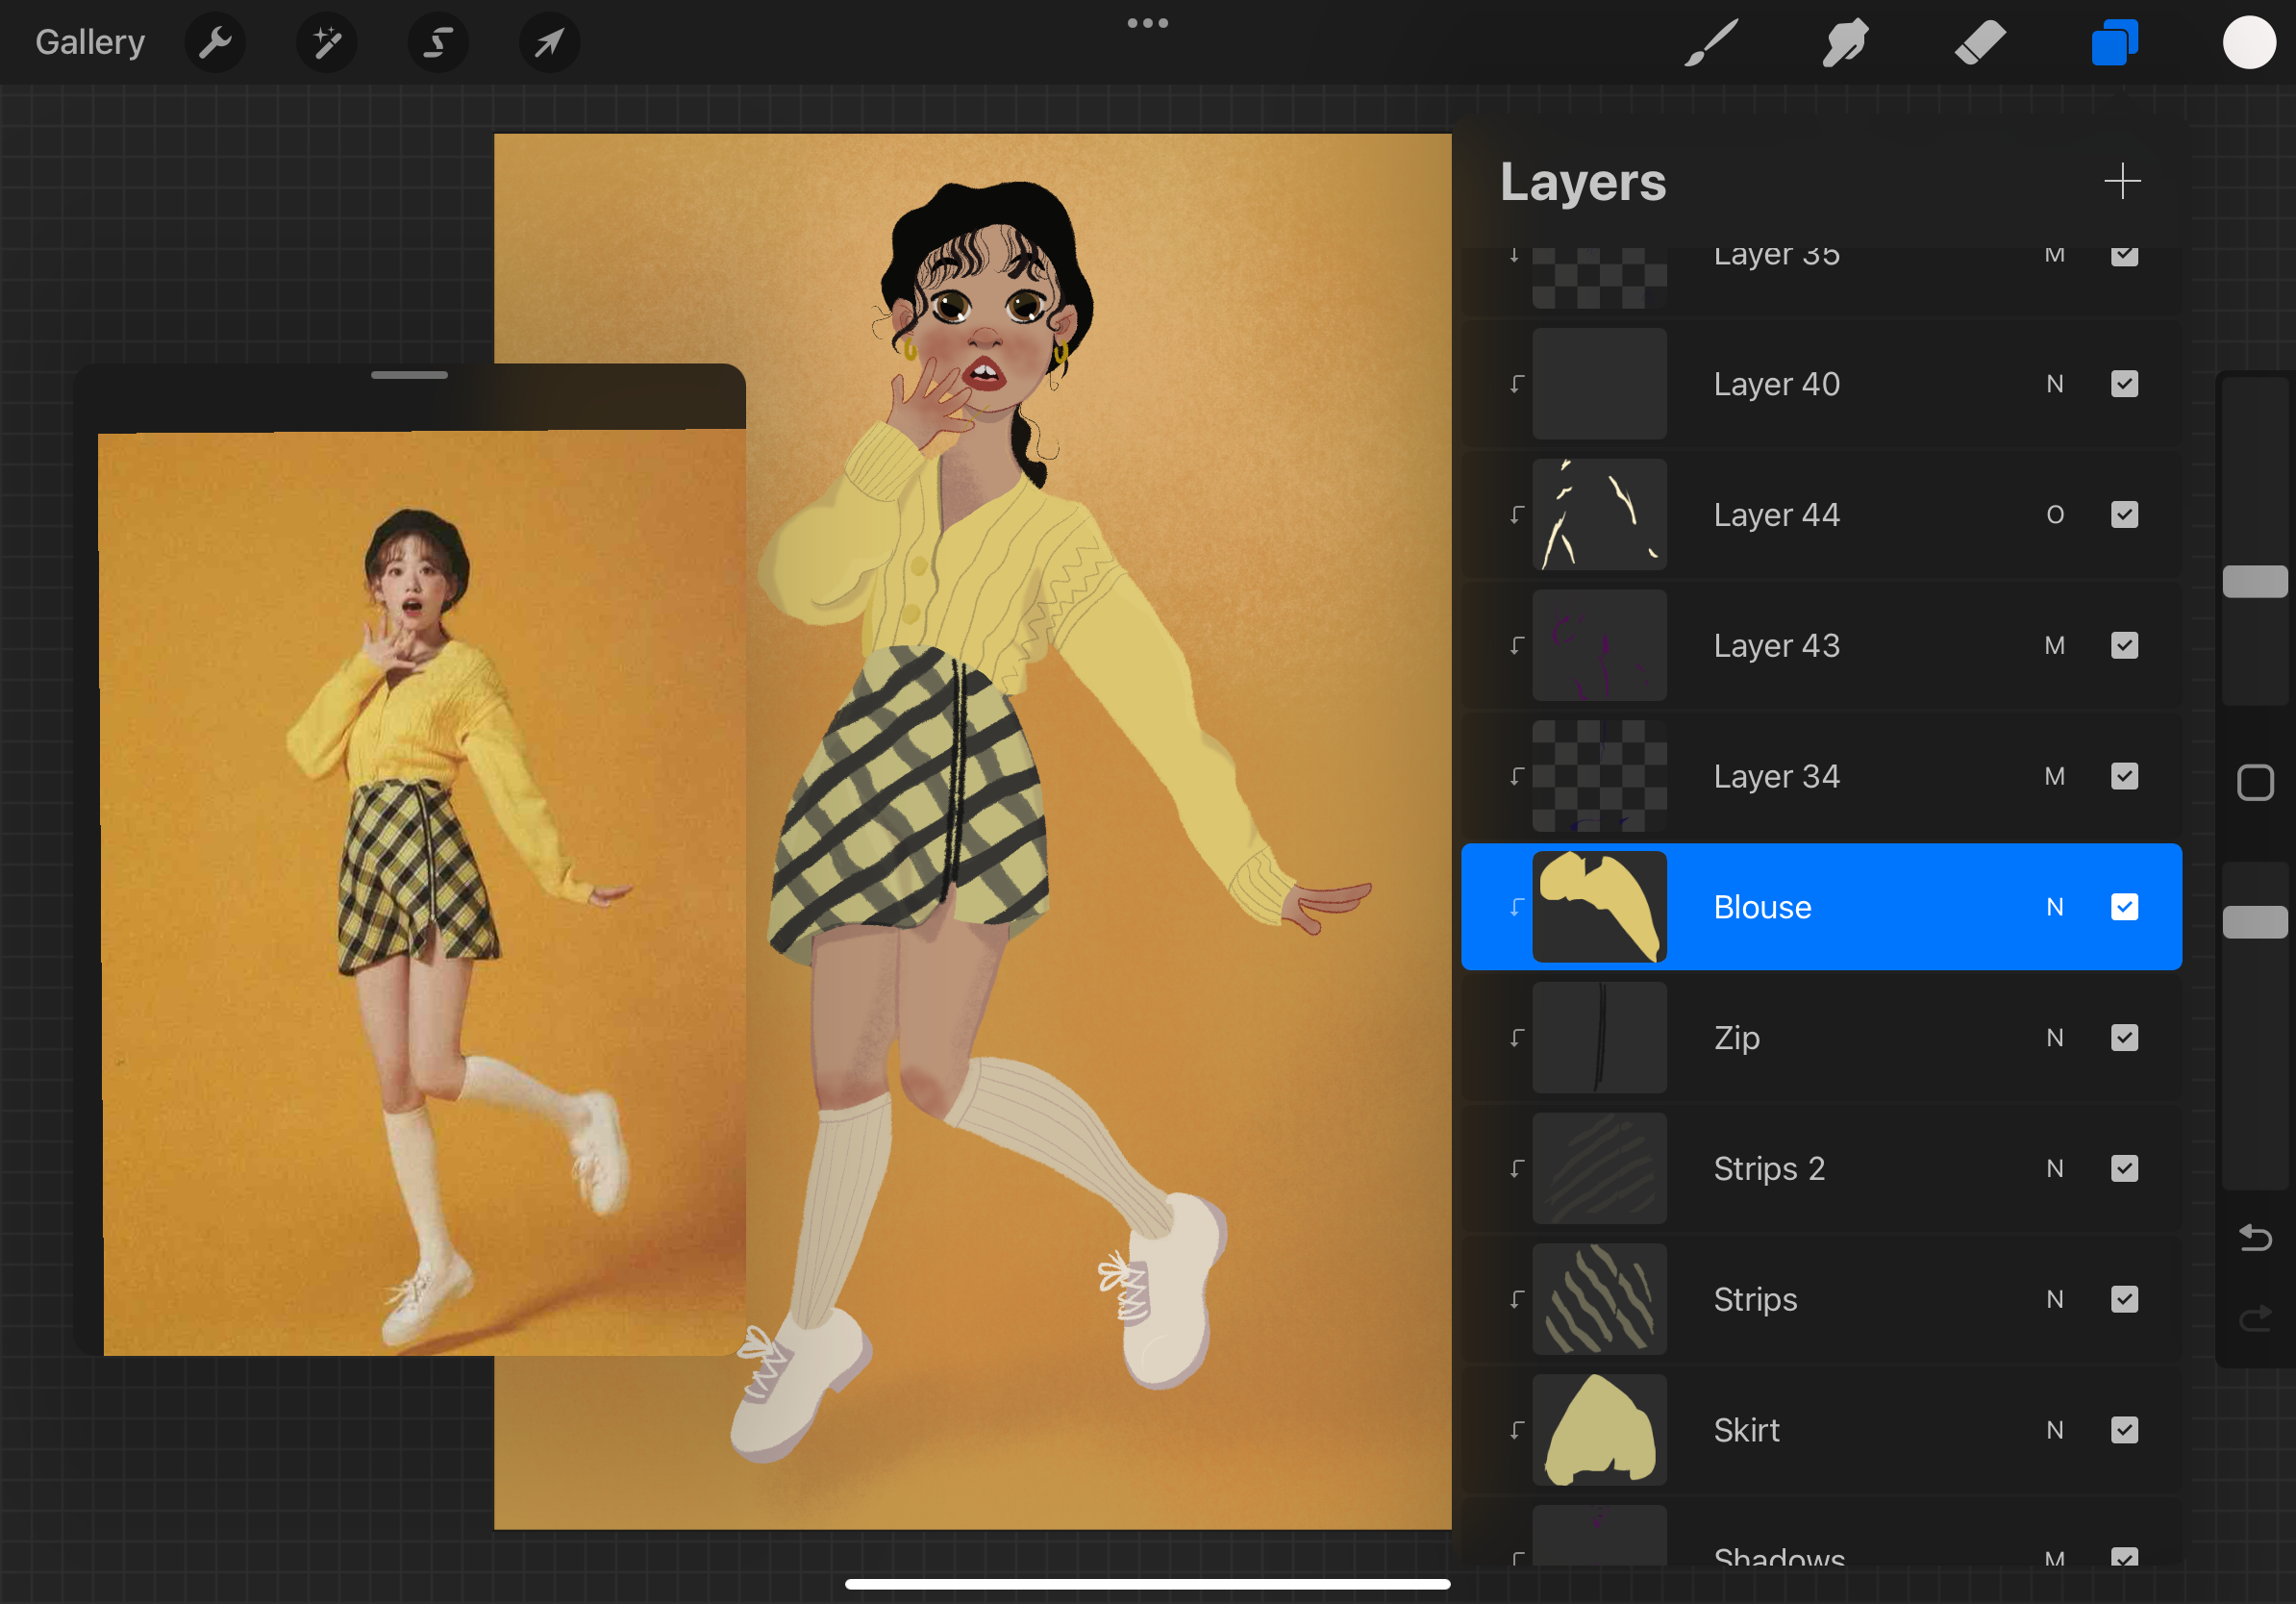
- Use Layers for Experimentation
Layers are a powerful tool in digital art. You can create a layer for your sketch, another for the base colors, and yet another for shading and highlights. This separation allows you to make changes and experiment freely without affecting the whole piece.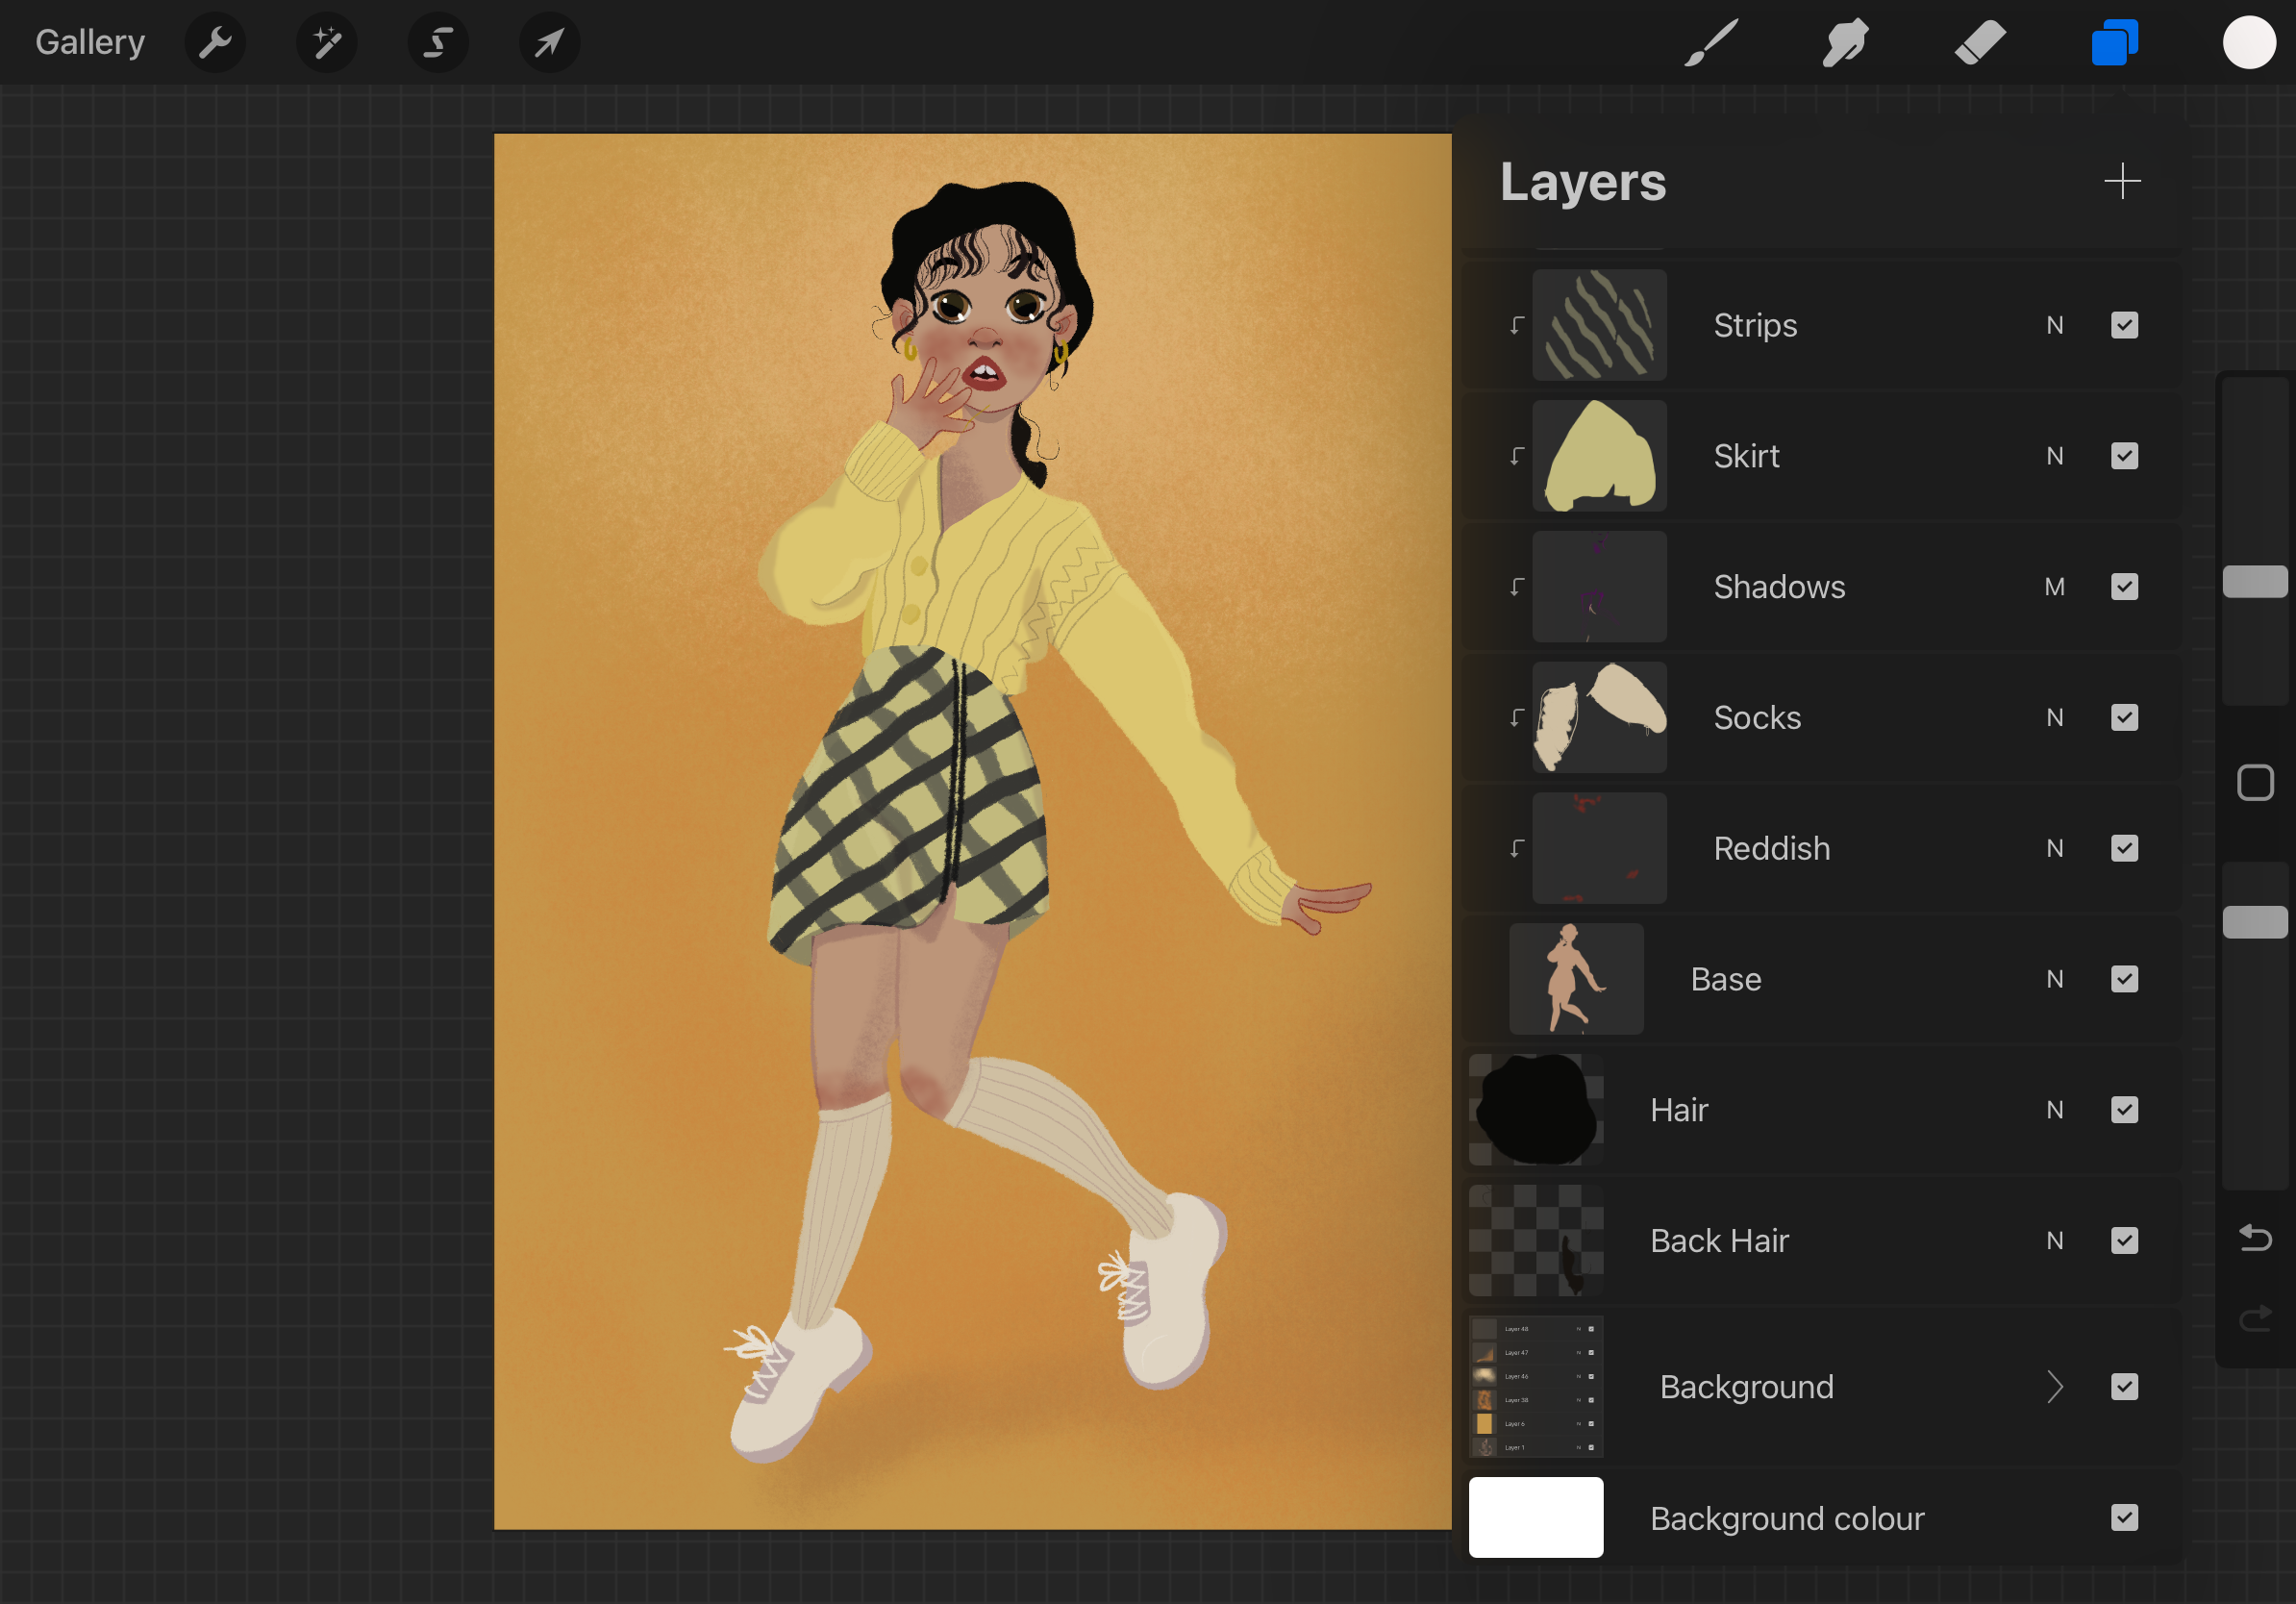
- Zoom in for Detail
Digital art gives you the advantage of zooming in to see every little detail of your reference photo. Use this feature to enhance the fine details, such as textures or tiny highlights, that will bring your artwork to life.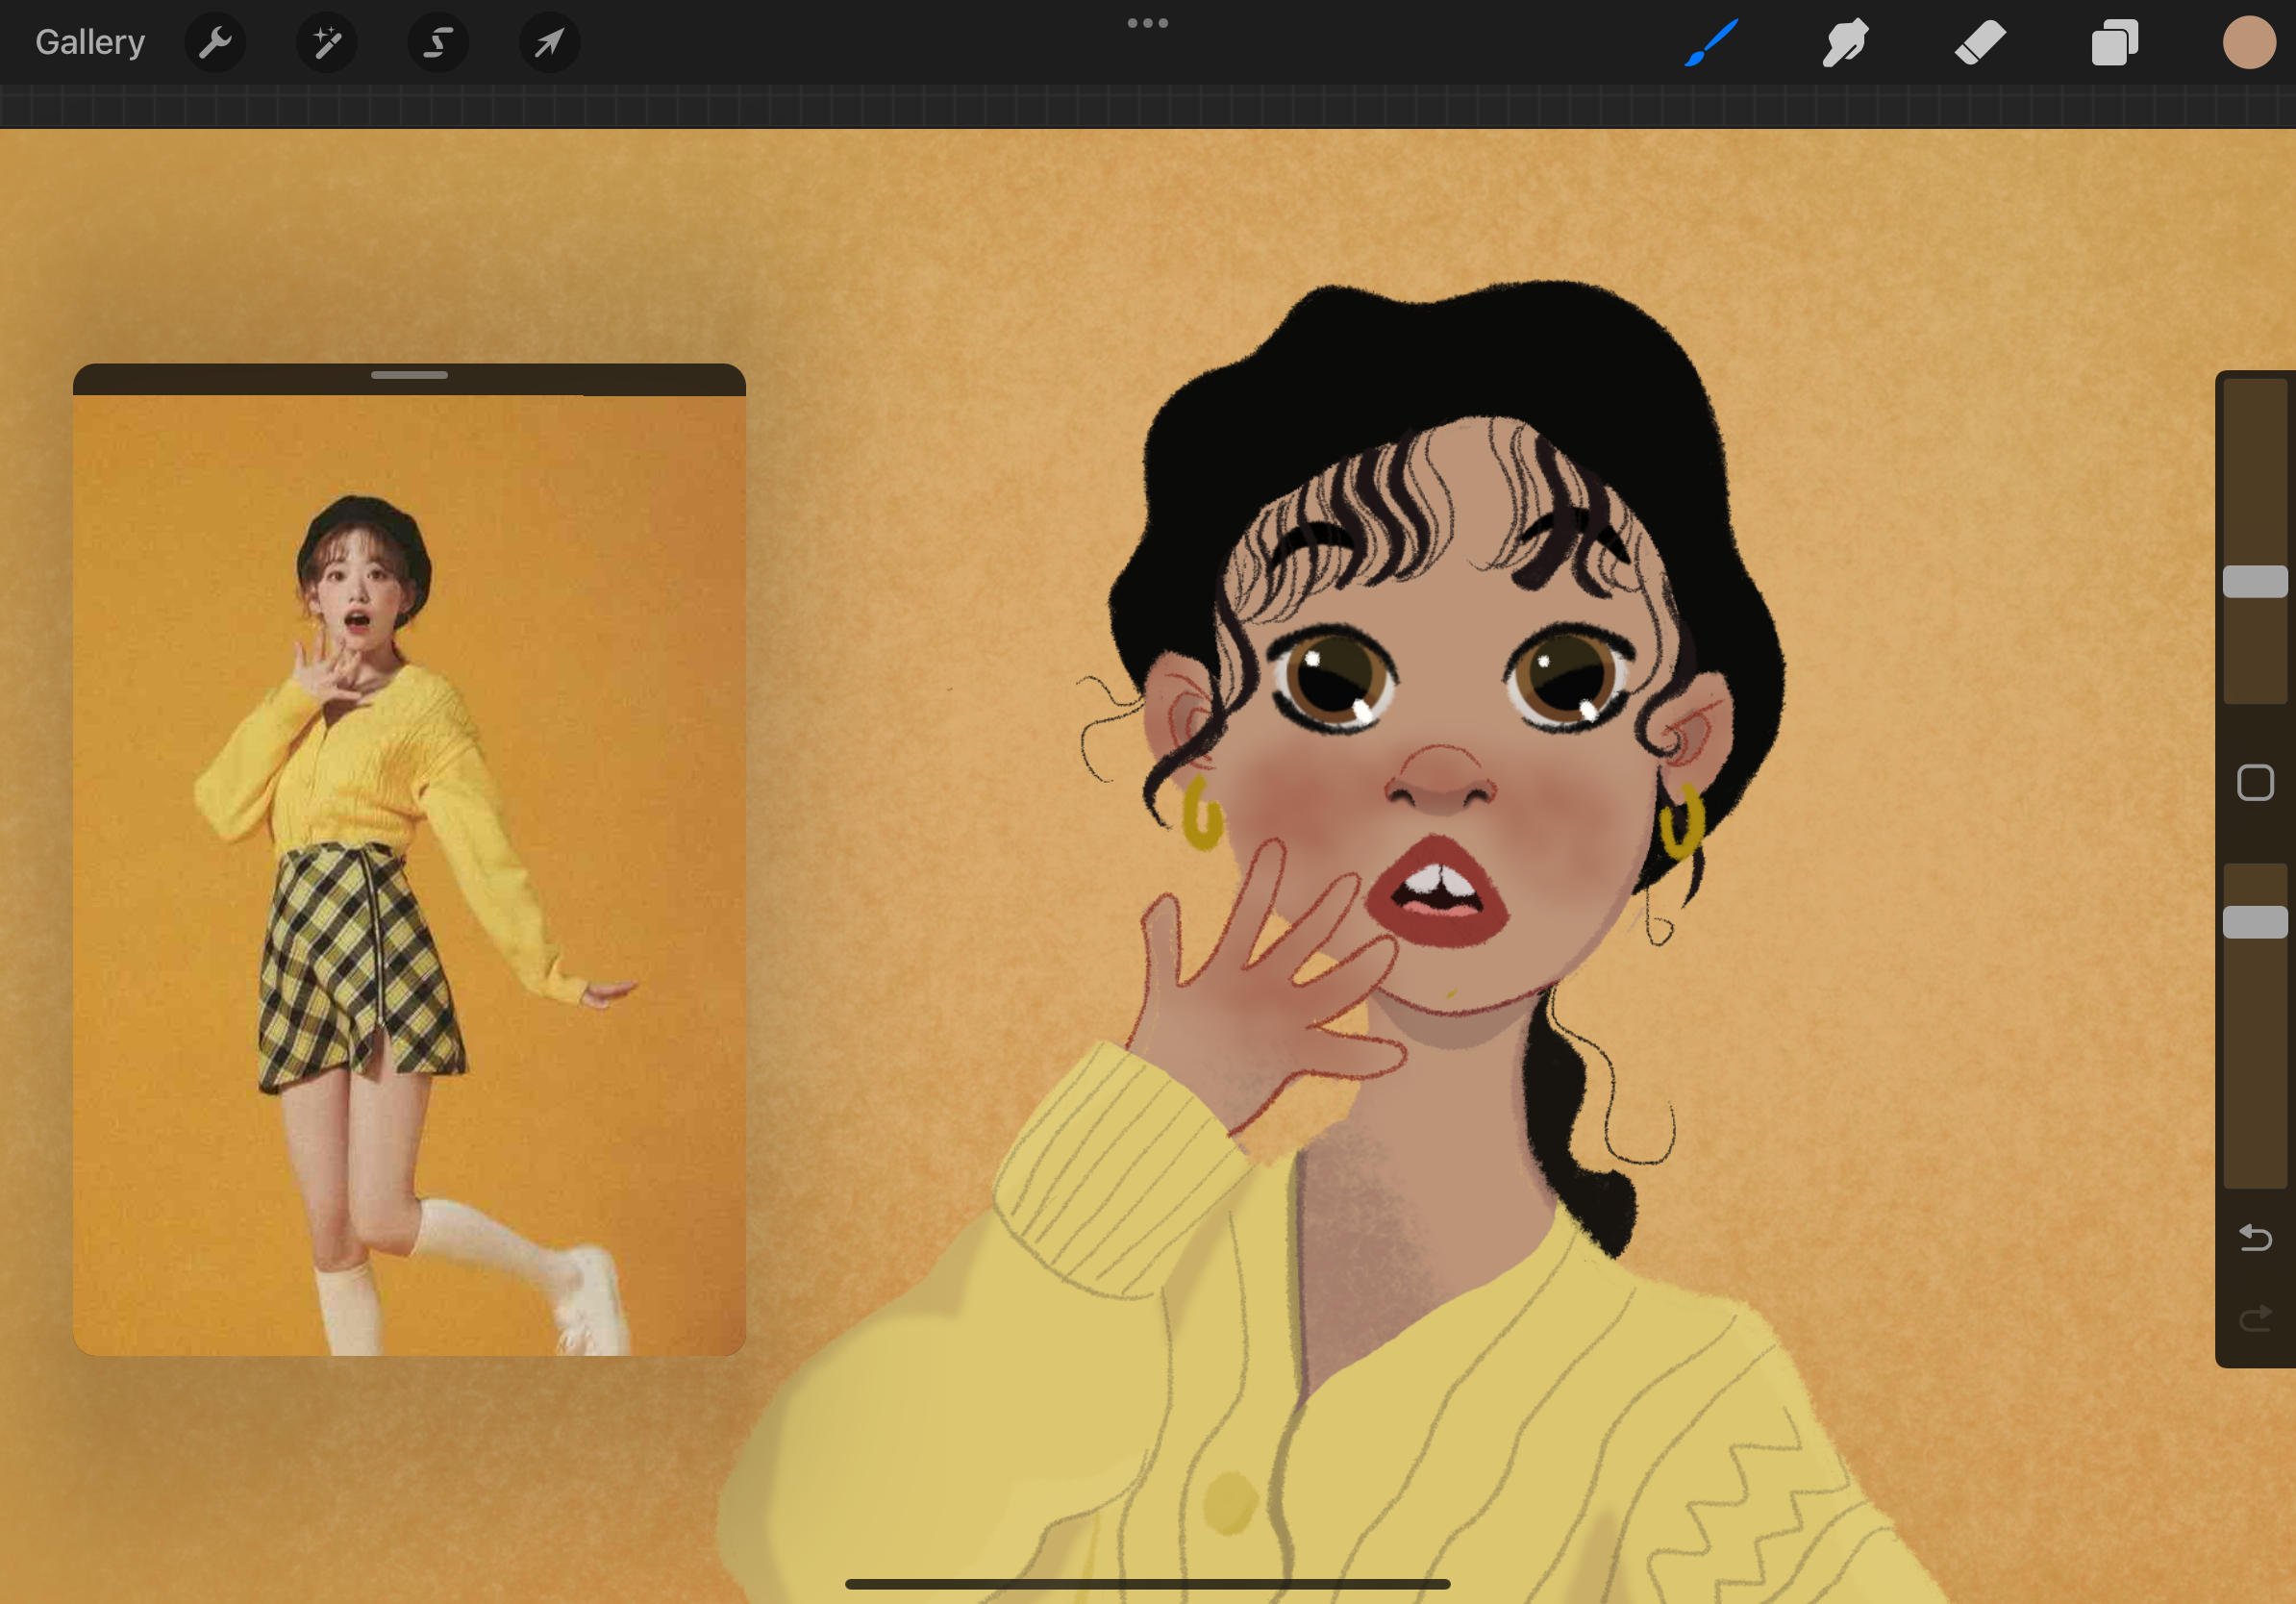
Conclusion
Drawing from a reference photo is an excellent way to build your skills and create more accurate and expressive art. Remember that using references is not about copying but about learning and improving your ability to capture form, proportions, and details. By following these steps and incorporating these drawing from reference good practice methods, you’ll become more confident in your ability to use references effectively.
If you found these drawing from a reference tips helpful, let me know in the comments! Happy drawing!